(3/3) - How to create a product : Step-by-step guide
Posted on - February 8, 2025 by Andy Cinquin
VPSCoolifyCloudflareTutoContractorPocketBase
Complete Guide to Creating a Successful Product - Part 3
This article assumes you've read the first two articles in the series:
- EN:
- FR:
You should now have a clear idea of what you want, product validation, a relatively advanced mockup, and an idea of how to implement everything.
Let's take a break, breathe a bit, and I'll give you a concrete example of the choices I've made so far, what I've installed, and we'll delve into the details.
Summary!
- Find an idea ✅
- Discuss it, validate it ✅
- Define an MVP (Minimum Viable Product), basically the smallest possible version that meets the need ✅
- Build this MVP ✅
- Simple design ✅
- Simple features ✅
- Simple hosting ✅
- Have it tested
- Continue improving it
- Handle communication around it
- And that's it!
Finding an Idea
In my case, the need came from me, but I could have just as easily gotten the idea from someone close to me! I'll take ForVoyez as an example: a SaaS that converts images to text for accessibility and SEO purposes!
Discussing It
I use several tools to mockup and prototype something that suits me and that I like:
- Figma: The Collaborative Interface Design Tool (optional)
- Excalidraw | Hand-drawn look & feel • Collaborative • Secure (optional)
- v0 by Vercel (optional)
- Claude (or ChatGPT)
After brainstorming with my associate, we find a name idea, create the logo, and establish the brand guidelines. For inspiration, we use:
- Refero — UI/UX Design Inspiration for Your Next Project (optional)
- Dribbble - Discover the World's Top Designers & Creative Professionals
For colors, we start with ones we like when generating our logo with:
- Midjourney (or Bing Image Generator, ChatGPT, etc.)
We base our design concepts on TailwindCSS:
- Refactoring UI with their excellent book (optional)
For colors, based on the logo, we adapt a palette with tools like:
- Tailwind CSS Color Generator | UI Colors (optional)
For typography, we choose something we like from Google Fonts:
- Browse Fonts - Google Fonts (optional)
For icons, we can use:
- Font Awesome (optional)
- Lucide (optional)
With all these elements, we can create a clean mockup faster. You can also skip all of this and do everything by hand - again, it depends on individual preference.
Choosing Our Technologies
First Option: Minimal Logic and SaaS Web App
Here, we keep it simple. Not much load expected, especially at the start, so we go small and fast. We choose "Clerk" to handle all authentication.
We don't need much logic, just an endpoint with logic inside, as all the work is done via OpenAI APIs. So we go with the "simplest" solution for us:
We use a PostgreSQL database because we're used to working with it. (In development mode, I use Neon to avoid installing PostgreSQL locally on my machine, which also allows me to use the same database between my laptop and desktop)
- Neon Serverless Postgres — Ship faster (not for production use as it's very expensive)
The entire application is developed in back + front with NextJS (as Next can handle backend too).
We manage our database calls with Prisma (an ORM):
We manage our database calls with Prisma (an ORM):
This allows us to manage everything locally for now, we're not worried about deployment at this stage.
Everything is on GitHub (GitHub), public, because we love and believe in open source!
Then we develop the first version of our application: the logic, a basic front-end, authentication, etc. The entire SaaS in just one weekend!
All payment logic, tokens, etc., is handled via webhooks and connections with:
(In reality, we should have used Stripe, which is much more effective).
Second Option: Need to Completely Decouple API from Front-end
For many reasons, we might want to decouple the backend from the front, and not build our backend directly with Next, especially if we need to manage many tables and endpoints, handle lots of different data, and have more than one schema to manage, with complex joins and relationships.
In this case, we still use Next, but we don't do database management via our NextJS API backend, only calls to an external server.
For this, we use:
- Next.js by Vercel - The React Framework
- Stripe | Financial Infrastructure to Grow Your Revenue
- GitHub
Same base as before, but additionally, we manage our complete backend with PocketBase for example:
which we run locally for testing and will deploy on a VPS later.
So we make a V1 like this to be able to develop our application comfortably.
Deployment
Once our application is finished and we have a good MVP start, something usable and nice, we'll want to deploy it and put it into production.
Here's where I'll explain how we did it and the architecture we use.
Here's where I'll explain how we did it and the architecture we use.
Here's what I have today for this kind of project:
- A VPS at Netcup for €6/month
- A domain name at OVH that I transferred to Cloudflare for €5/year
And lots of free services on the side, we'll come back to those.
- Total cost: €6.25/month MAXIMUM 😊
(That's reasonable for a service that can handle hundreds of thousands of visits per minute!)
How to Do It?
Short article on installing a new server with Coolify:
- VPS installation and configuration guide for Coolify (EN)
- Installation et configuration d'un VPS pour Coolify (FR)
Once you have Coolify and your VPS configured, you can simply create a link to your GitHub, configure what you want, click "deploy", and there you go!
Example with PocketBase:
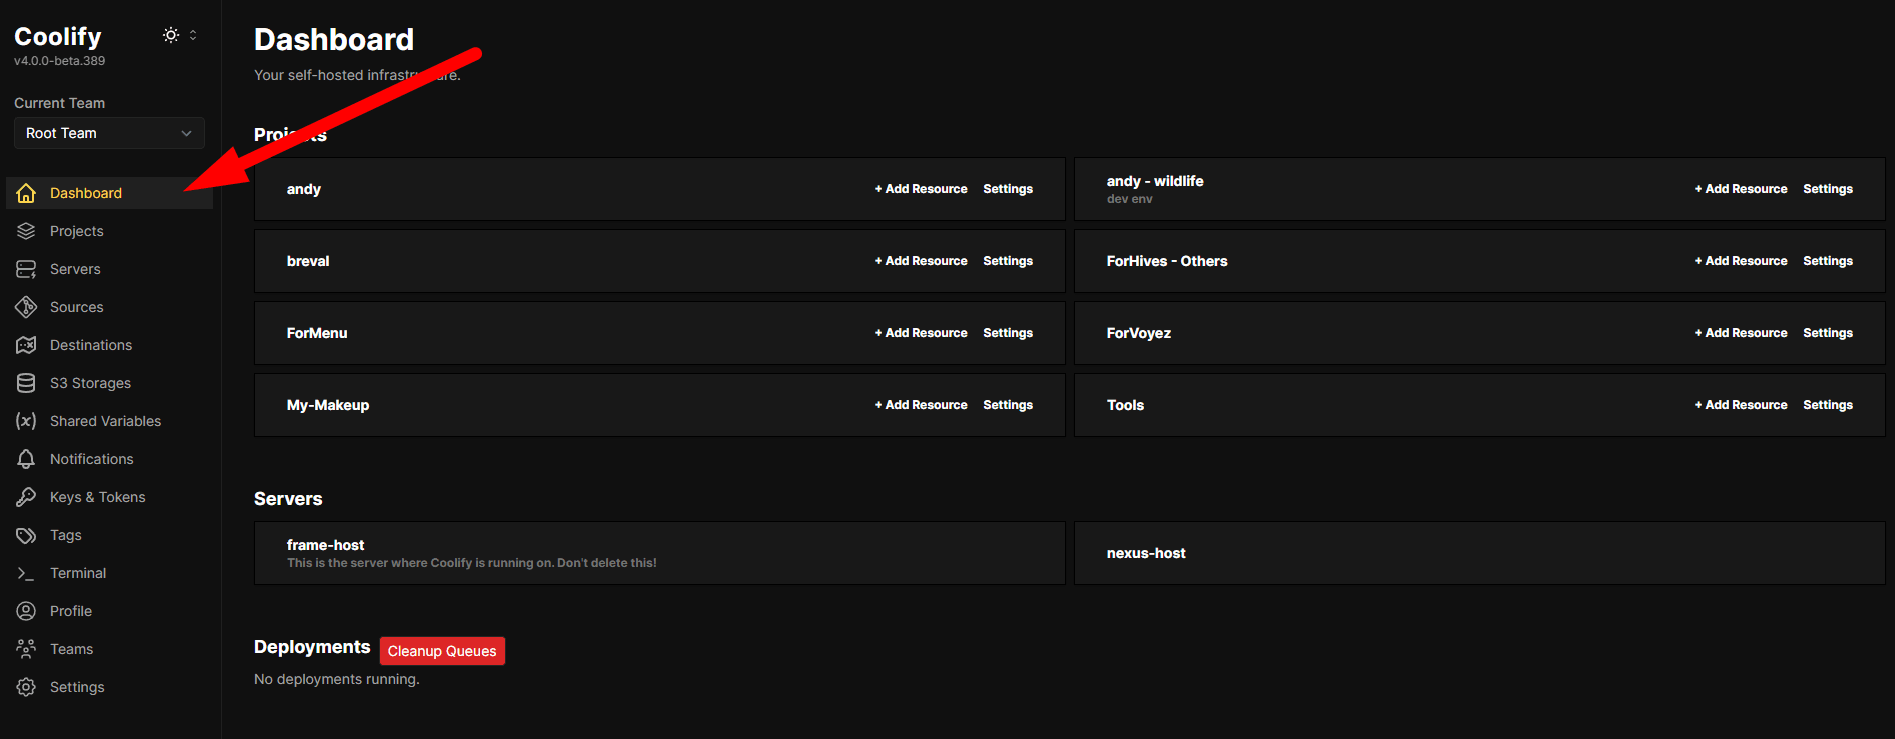
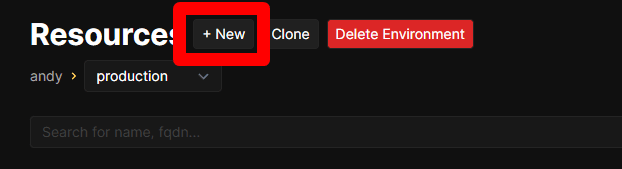
Go to our projects, then "new"
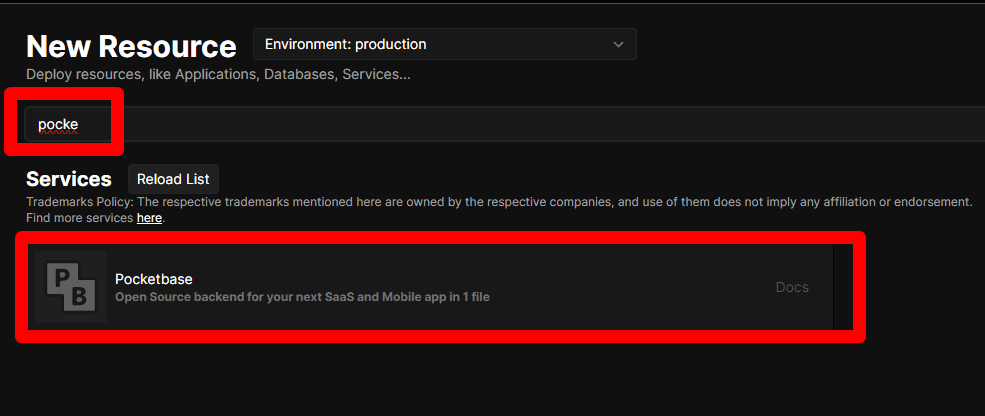
Select a GitHub link or existing image, here we want PocketBase:
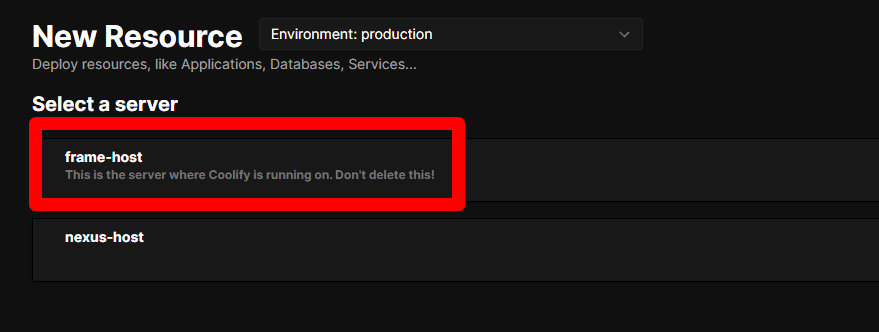
Select PocketBase, then the server of your choice (you can have several to share the load)
Select what you want and add the names you need:
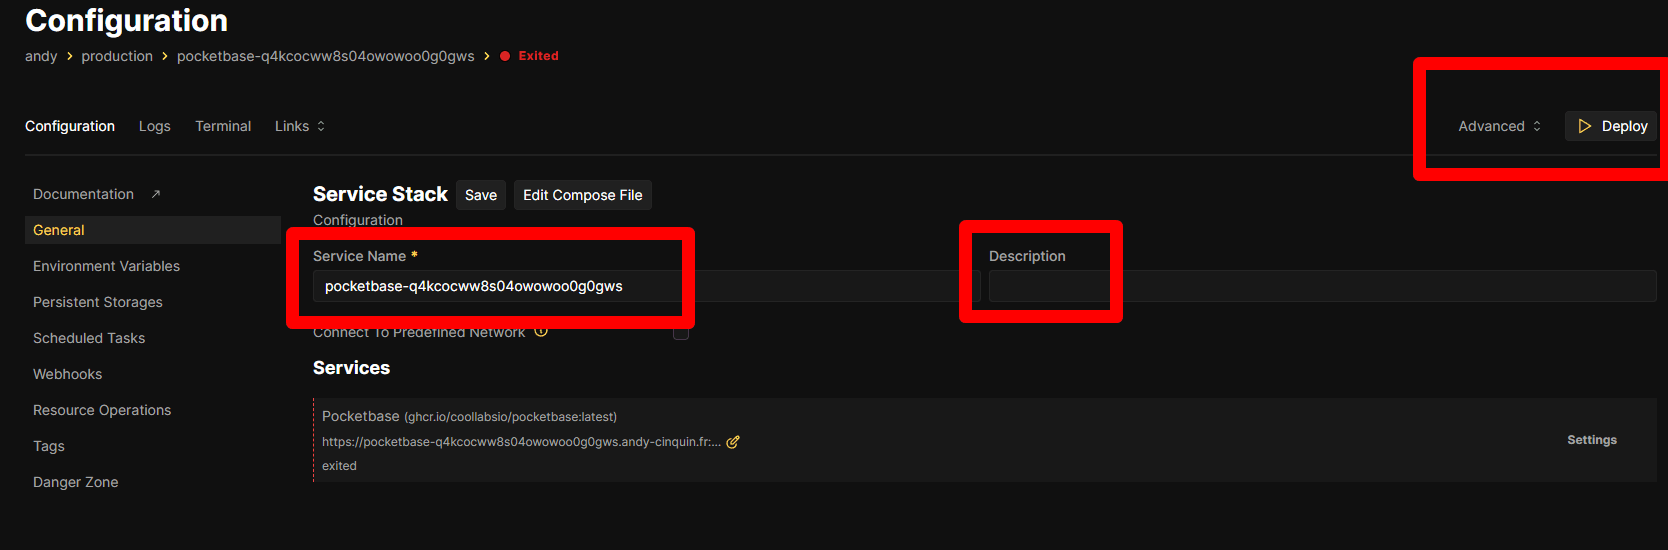
Then click "deploy"
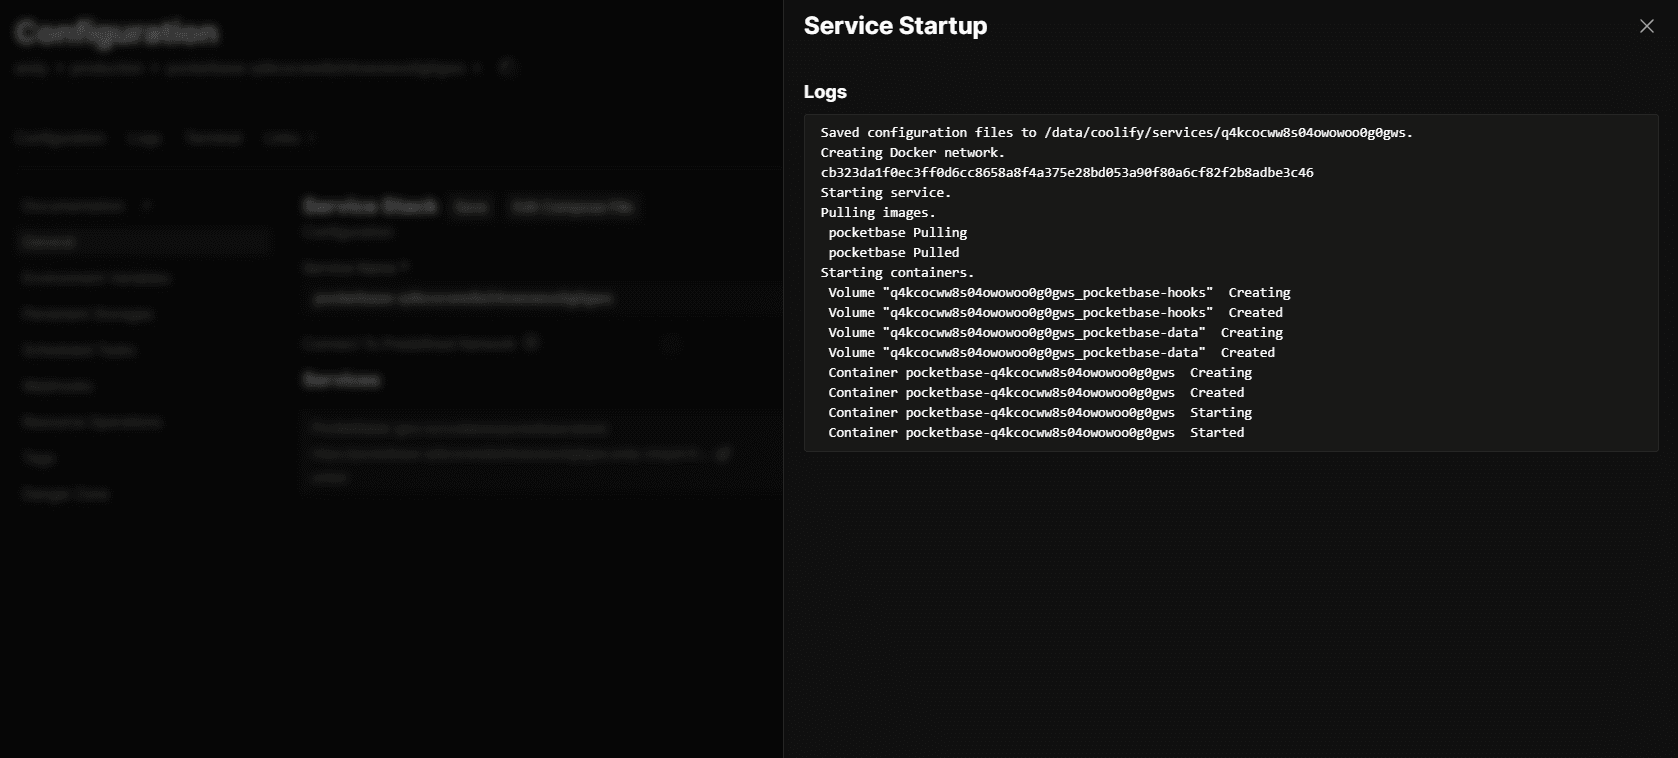
The deployment starts, it's quite fast!
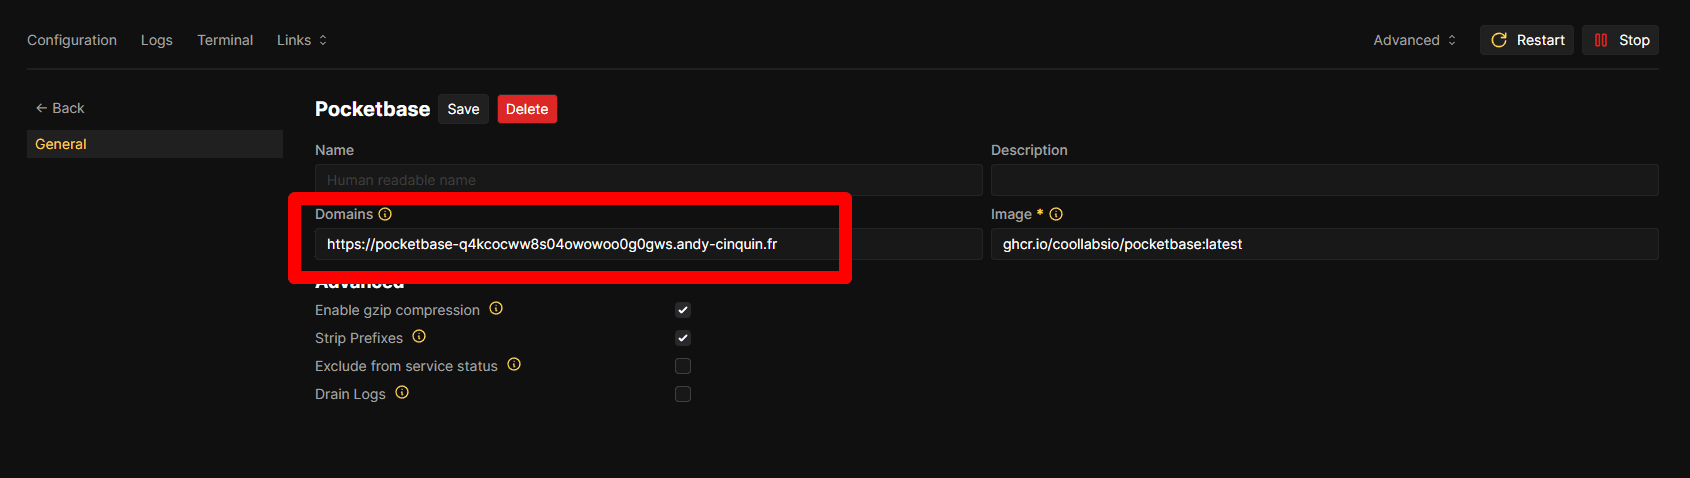
Wait for the deployment to finish, then go directly to the address Coolify gave us, or the one we configured, directly from the web.
Wait for the deployment to finish, then go directly to the address Coolify gave us, or the one we configured, directly from the web.
For PocketBase, in my case, we'll access:
https://pocketbase-q4kcocww8s04owowoo0g0gws.andy-cinquin.fr/_/#/pbinstal/eyJhbGciOiJIUzI1NiIsInR5cCI6IkpXVCJ9.eyJjb2xsZWN0aW9uSWQiOiJwYmNfMzE0MjYzNTgyMyIsImV4cCI6MTczOTA1MTczMiwiaWQiOiIwZ24zM2d6NmR4dDl4dzIiLCJyZWZyZXNoYWJsZSI6ZmFsc2UsInR5cGUiOiJhdXRoIn0.hRRH2ulSg6HeGWncpZucSJjIXoniK1rXeOgzR-FrKoQWe get this secure link from the build:
We have this base link, and the token is given in the build found in "logs"
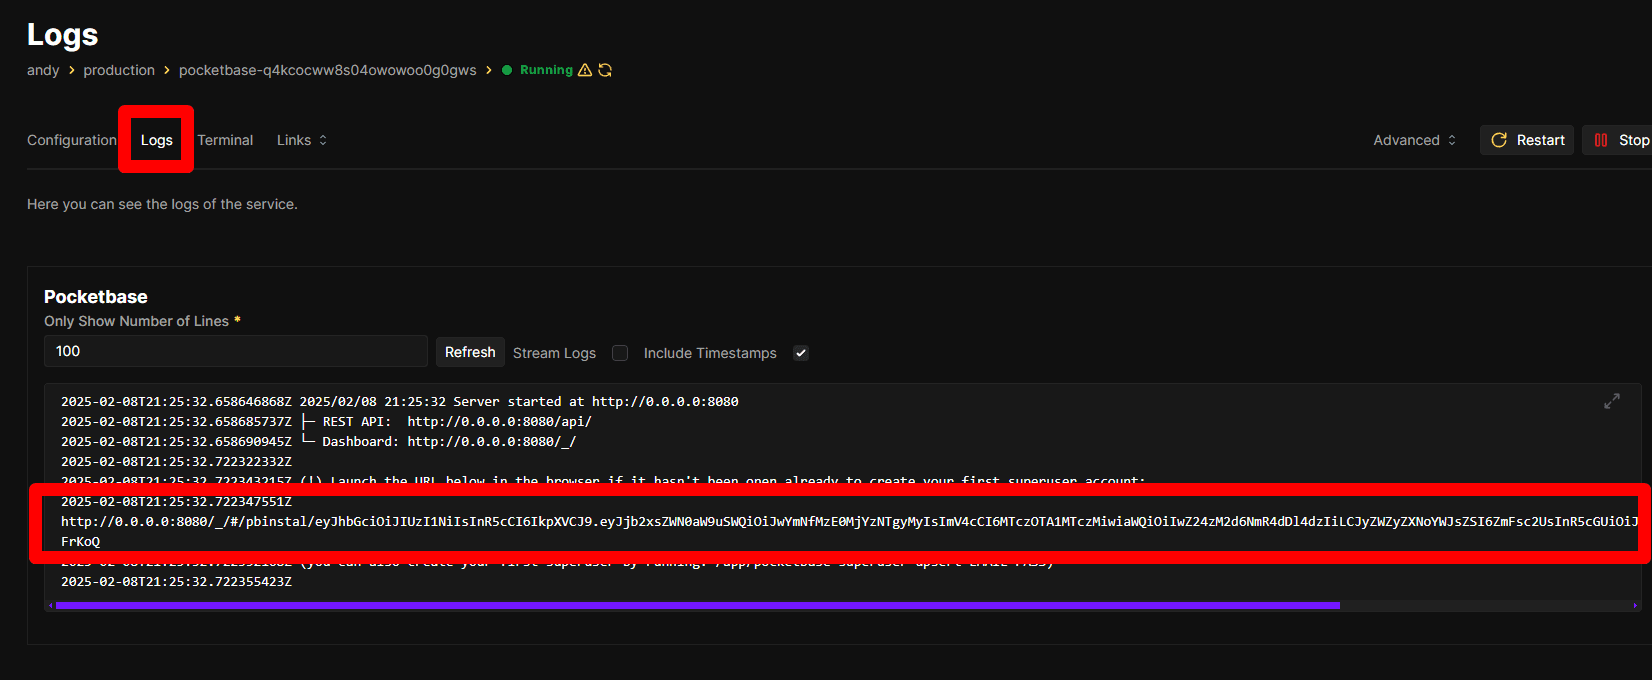
Copy this token and access it directly on the web:
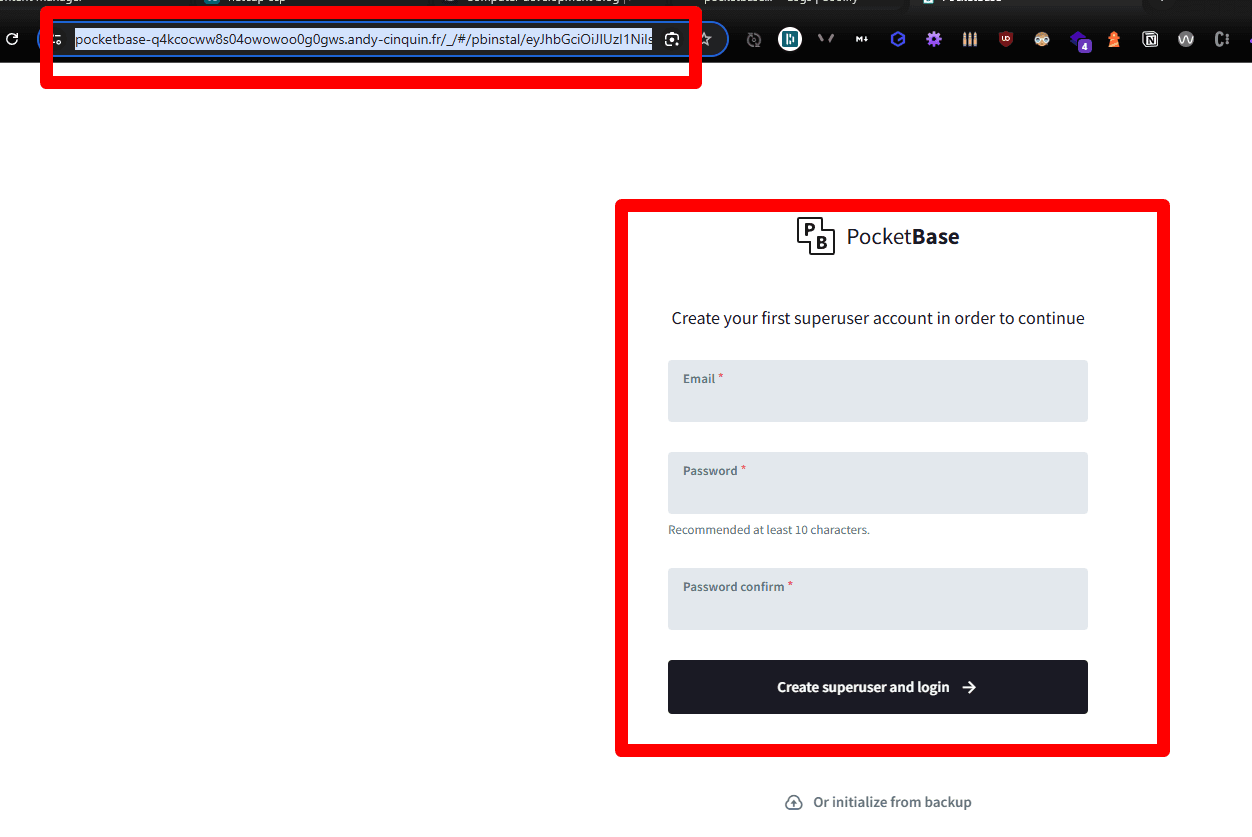
It looks like this:
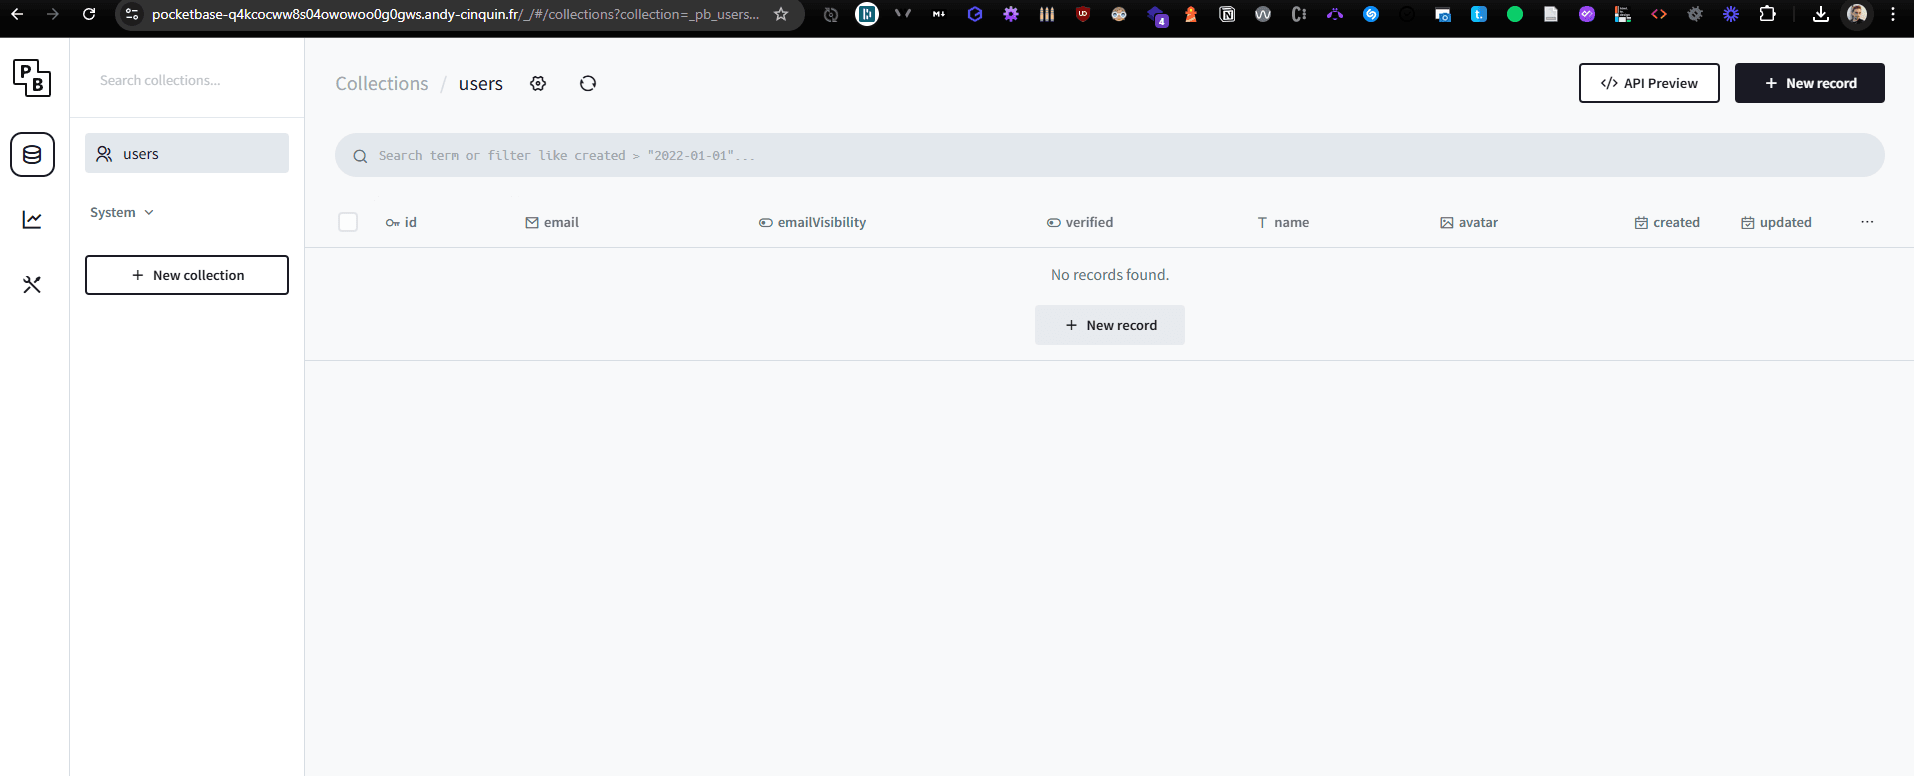
Need a product list?
No problem, create a "product" collection
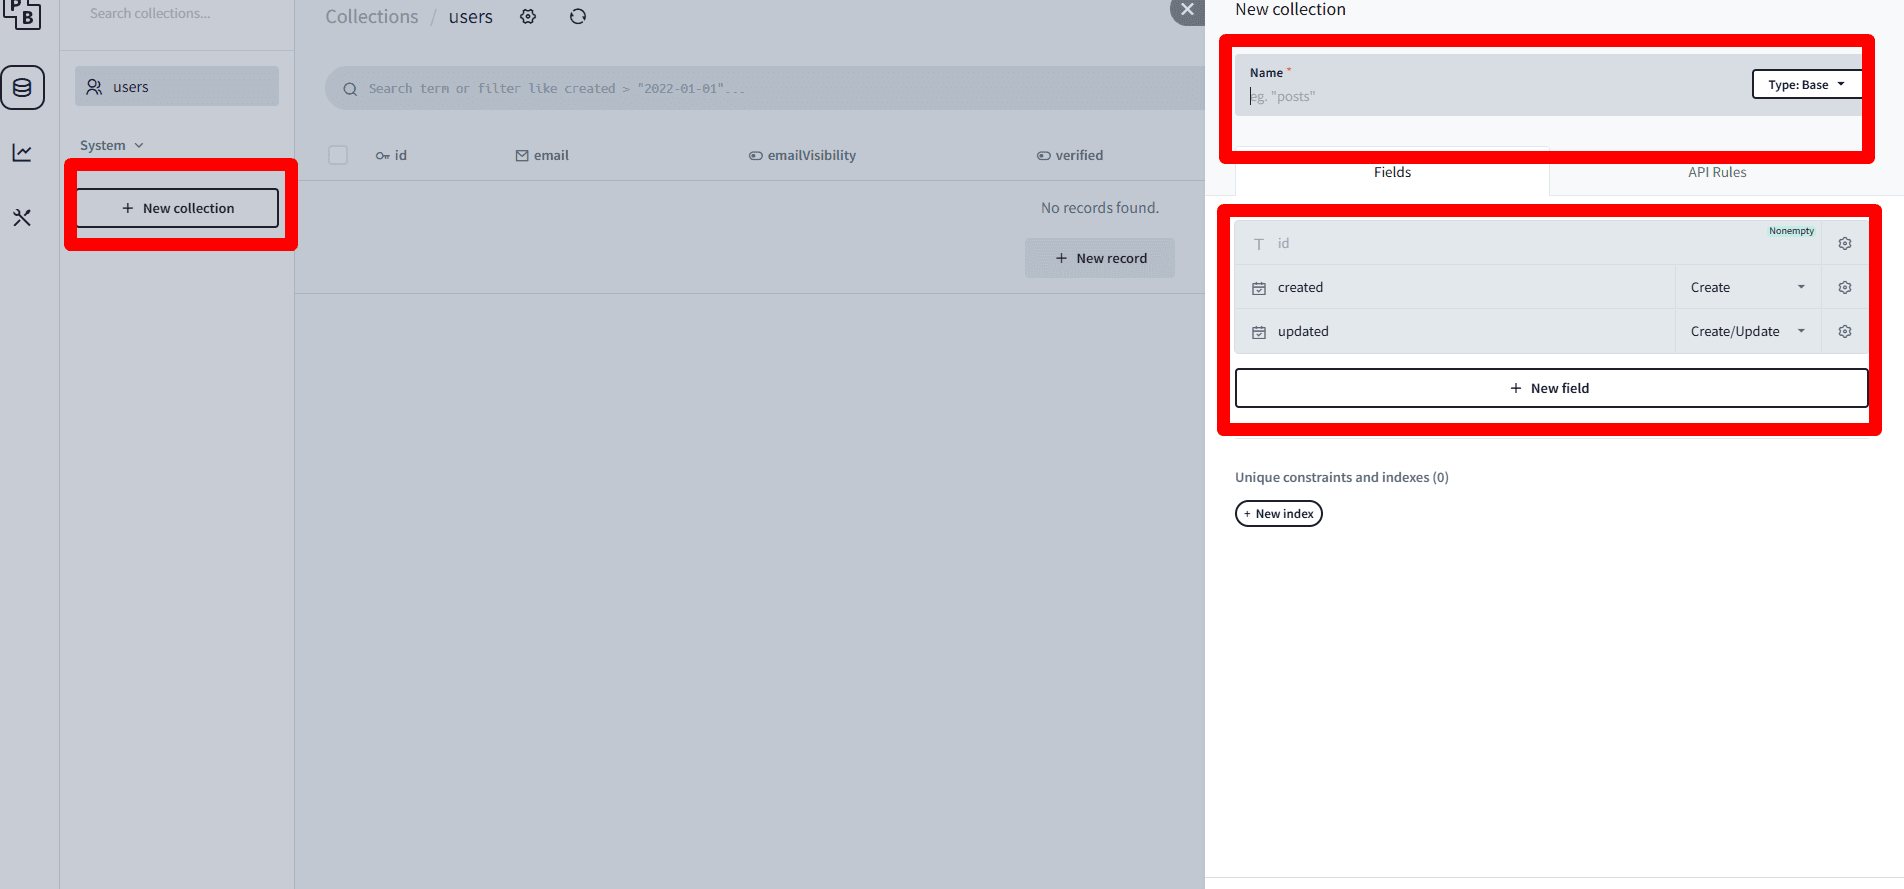
No problem, create a "product" collection
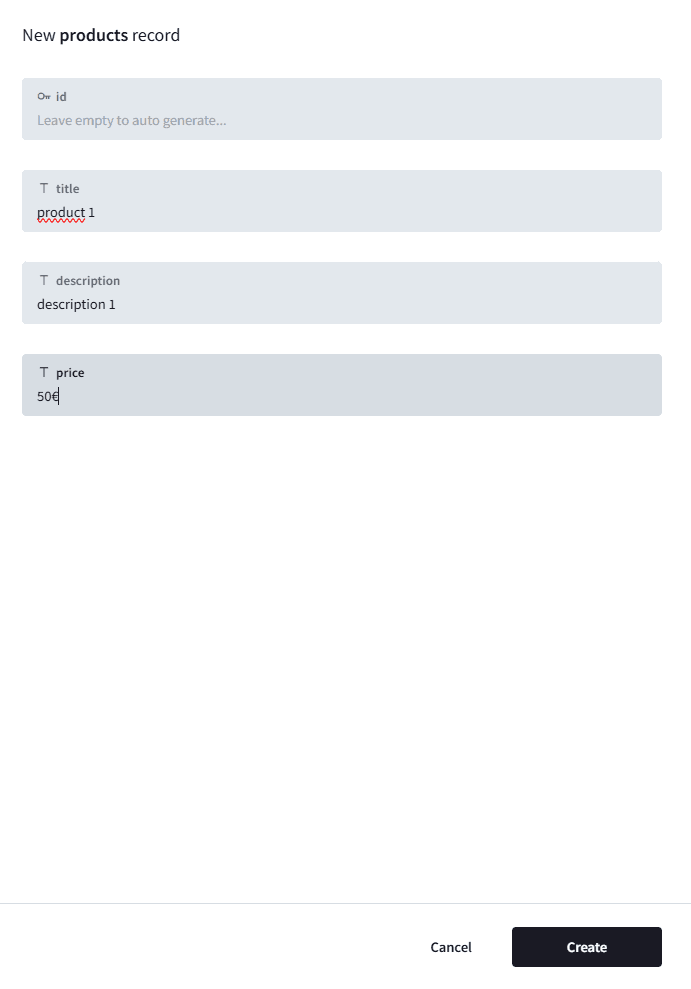
Create the collection, table, directly with the names and fields we need
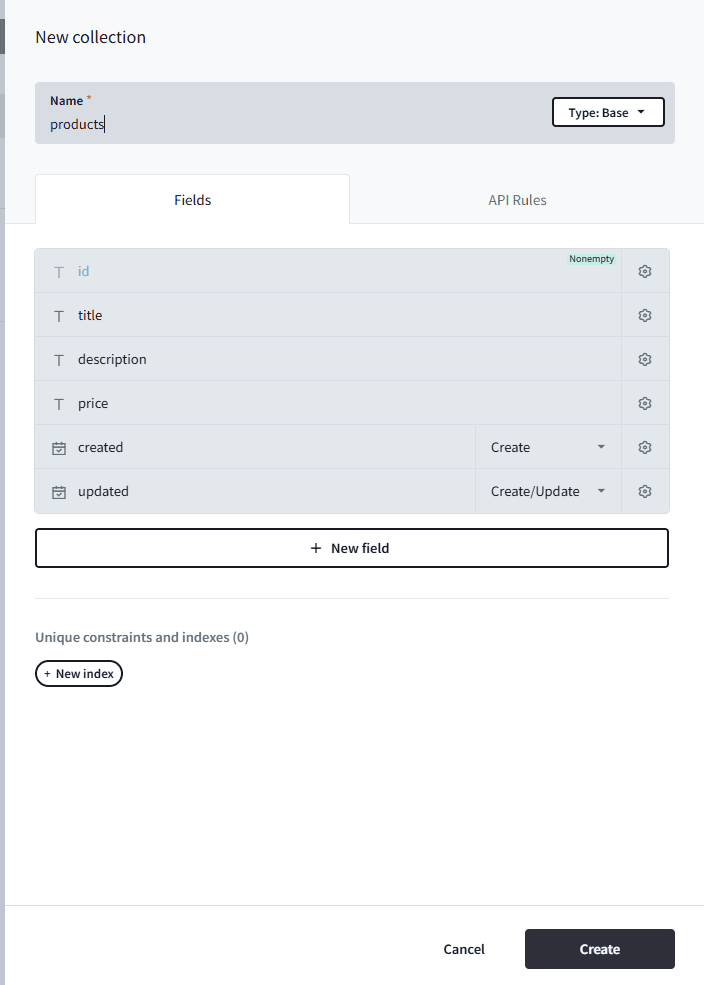
Then just create new elements, data in this table.
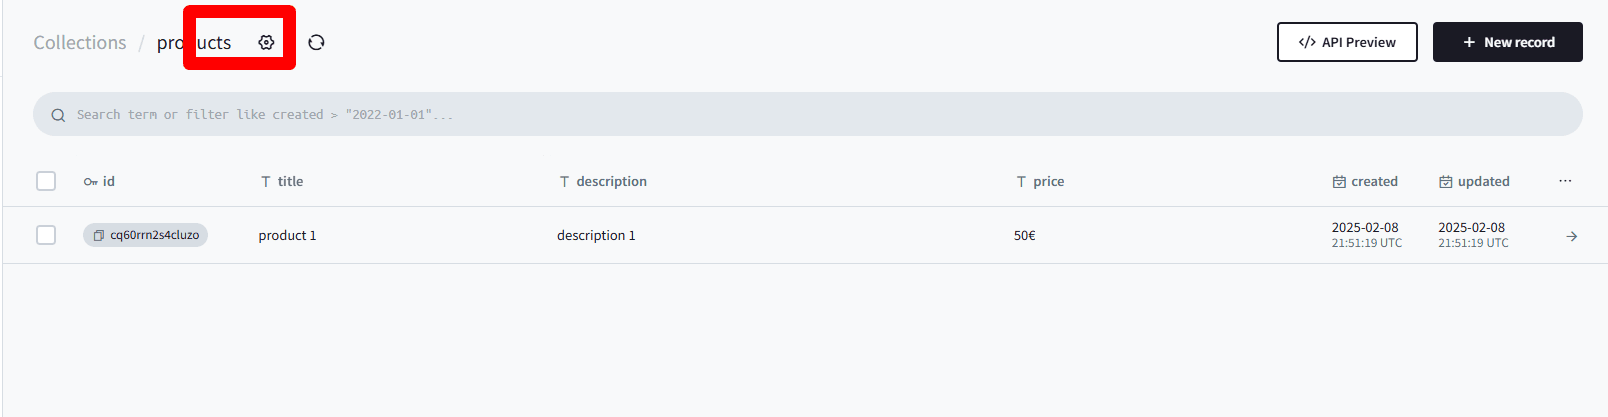
Great, but how do I retrieve this from my application?
Nothing simpler, we have an "API preview", let's go in and get the endpoint
Nothing simpler, we have an "API preview", let's go in and get the endpoint
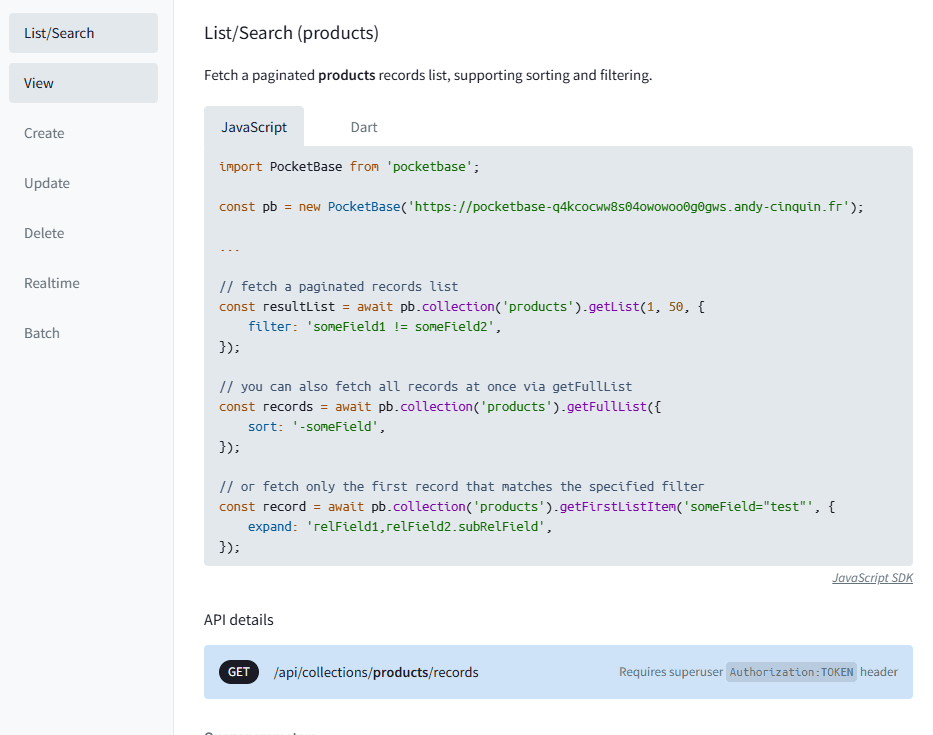
We just need to use "/api/collections/products/records"
to get our product list. We'll send the request with the proper headers and tokens, and we'll directly retrieve the resources.
to get our product list. We'll send the request with the proper headers and tokens, and we'll directly retrieve the resources.
Via GET, on:
https://pocketbase-q4kcocww8s04owowoo0g0gws.andy-cinquin.fr- so
https://pocketbase-q4kcocww8s04owowoo0g0gws.andy-cinquin.fr/api/collections/products/records
We can give whatever rights we want here:
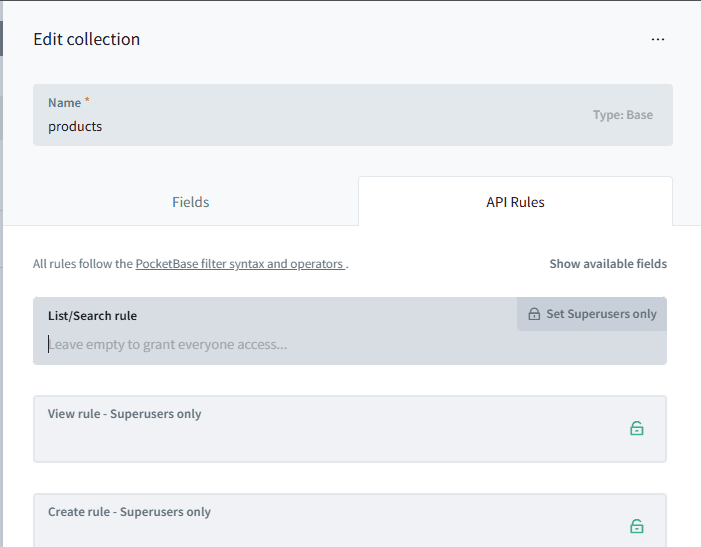
and then access it directly from a classic fetch.
Example with authentication:
With a super user to give access to our API:
With a super user to give access to our API:
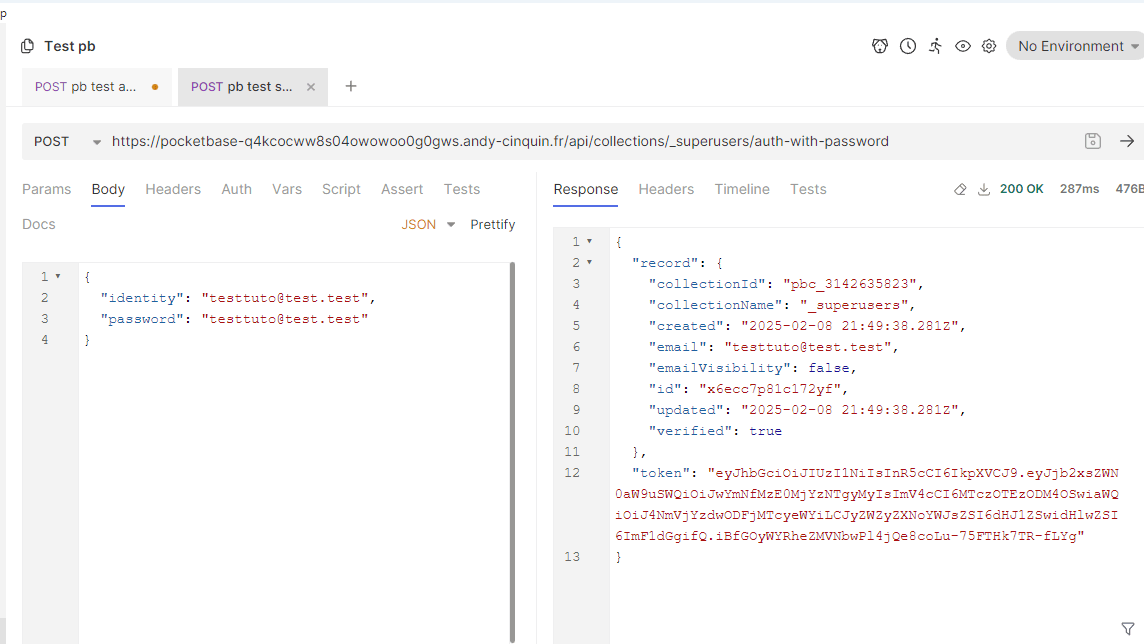
We can for example get our token like this:
With this body:
https://pocketbase-q4kcocww8s04owowoo0g0gws.andy-cinquin.fr/api/collections/_superusers/auth-with-passwordWith this body:
{
  "identity": "testtuto@test.test",
  "password": "testtuto@test.test"
}
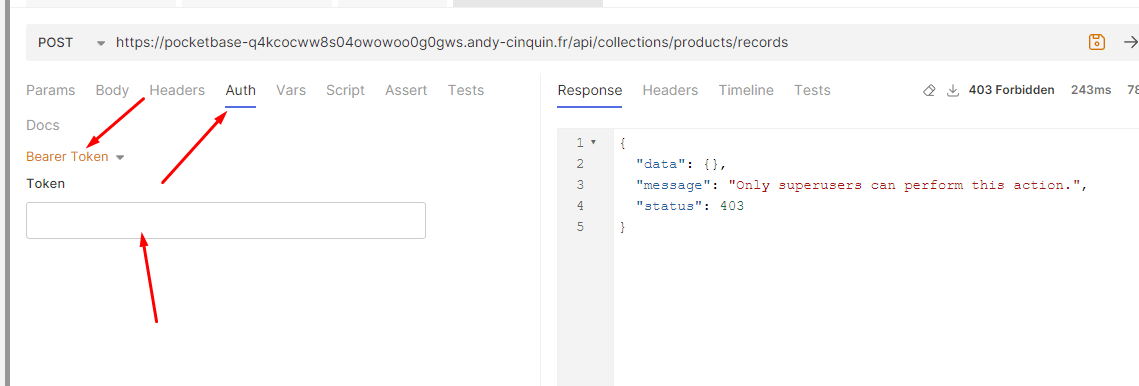
Your credentials will let you get this kind of response. You'll then use this token in the bearer to create things as superadmin (if no rights have been changed, you need this token everywhere when using the API)
Example:
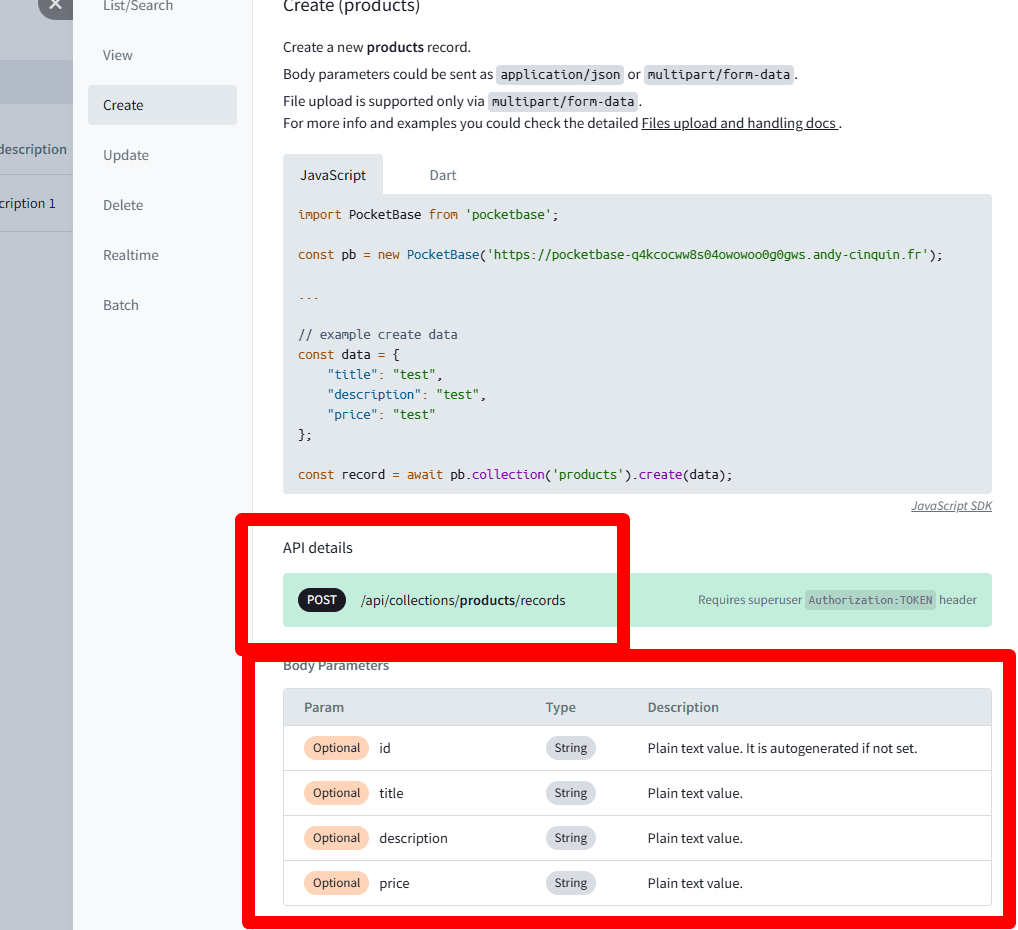
So on:
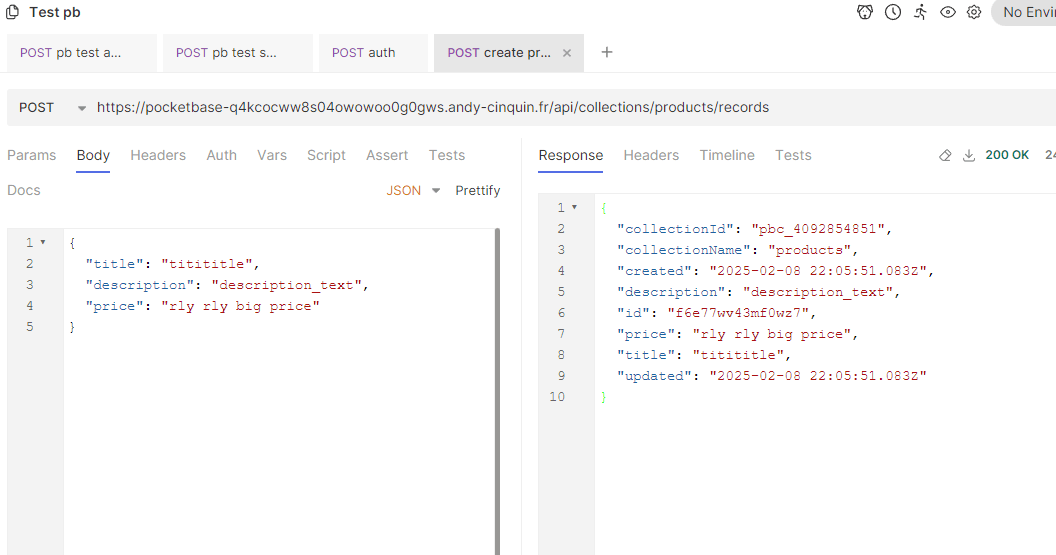
you can create what you want:
https://pocketbase-q4kcocww8s04owowoo0g0gws.andy-cinquin.fr/api/collections/products with "POST"you can create what you want:
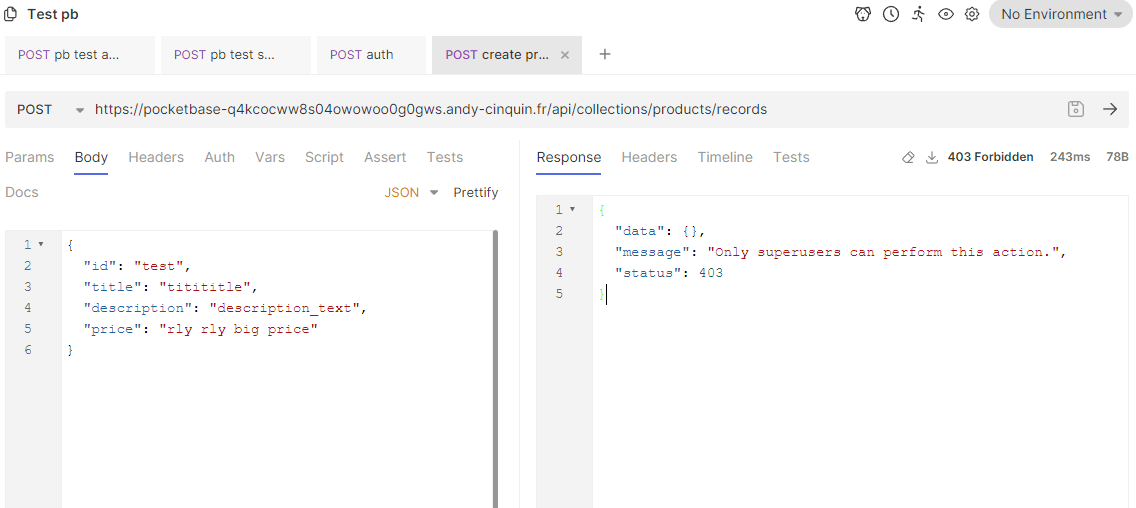
Without a token you'll get this kind of error, with the bearer it will work
and there you go:
Pretty quick, right?
If we compare this to creating a CRUD system with permissions, authentication, real-time capabilities, images that can be offloaded to S3, with an automatic backup system, I think these few hours spent on this tool are... worth it, don't you think? 😊
If we compare this to creating a CRUD system with permissions, authentication, real-time capabilities, images that can be offloaded to S3, with an automatic backup system, I think these few hours spent on this tool are... worth it, don't you think? 😊
All that's left is to connect the API to your front-end, nothing simpler, just call the endpoints with a Fetch!
In Next, it looks something like this:
In Next, it looks something like this:
For example, when using PocketBase's SDK, basically a simple
pb.collection('products').getFullList() is enough to get all products, then you just need to loop through this data to display it in the front-end.And there you have it! We have our functional Headless CMS, and an entire decoupled API with logic, auth, and everything that goes with it! 😄
And all of this, in just a few clicks!
Application from A to Z in a week, maximum - pretty amazing, right? 😊
🚀 Thanks for reading!
If you enjoyed this article, feel free to share it around.
💡 Got an idea? Let's talk !☕