Logo Cinquin Andy Signature

Guide: Obsidian plug-in for exporting notes to Strapi

Développeur Freelance - Logo

Guide: Obsidian plug-in for exporting notes to Strapi

Posted on April 4, 2024 -  by Andy Cinquin

Obsidian pluginStrapiExport notesStep-by-step configurationObsidianAPI StrapiOpenAIContent export

Obsidian Plugin for exporting a note to Strapi

In this article, we'll take a step-by-step look at how to use my Obsidian Plugin in Strapi.
The elements required are :
  • An item you want to publish, written in your Obsidian Vault
  • An API online, and available.
  • Remote access from the Internet to your API possible (local access won't work!).
  • An OpenAI key.

Tuto

When I create this article, I'm going to go through the configuration of this plugin with you. First step, install the plugin:🚀 Strapi Exporter: Supercharge Your Obsidian-to-Strapi Workflow, export an obsidian notes directly to your Strapi API
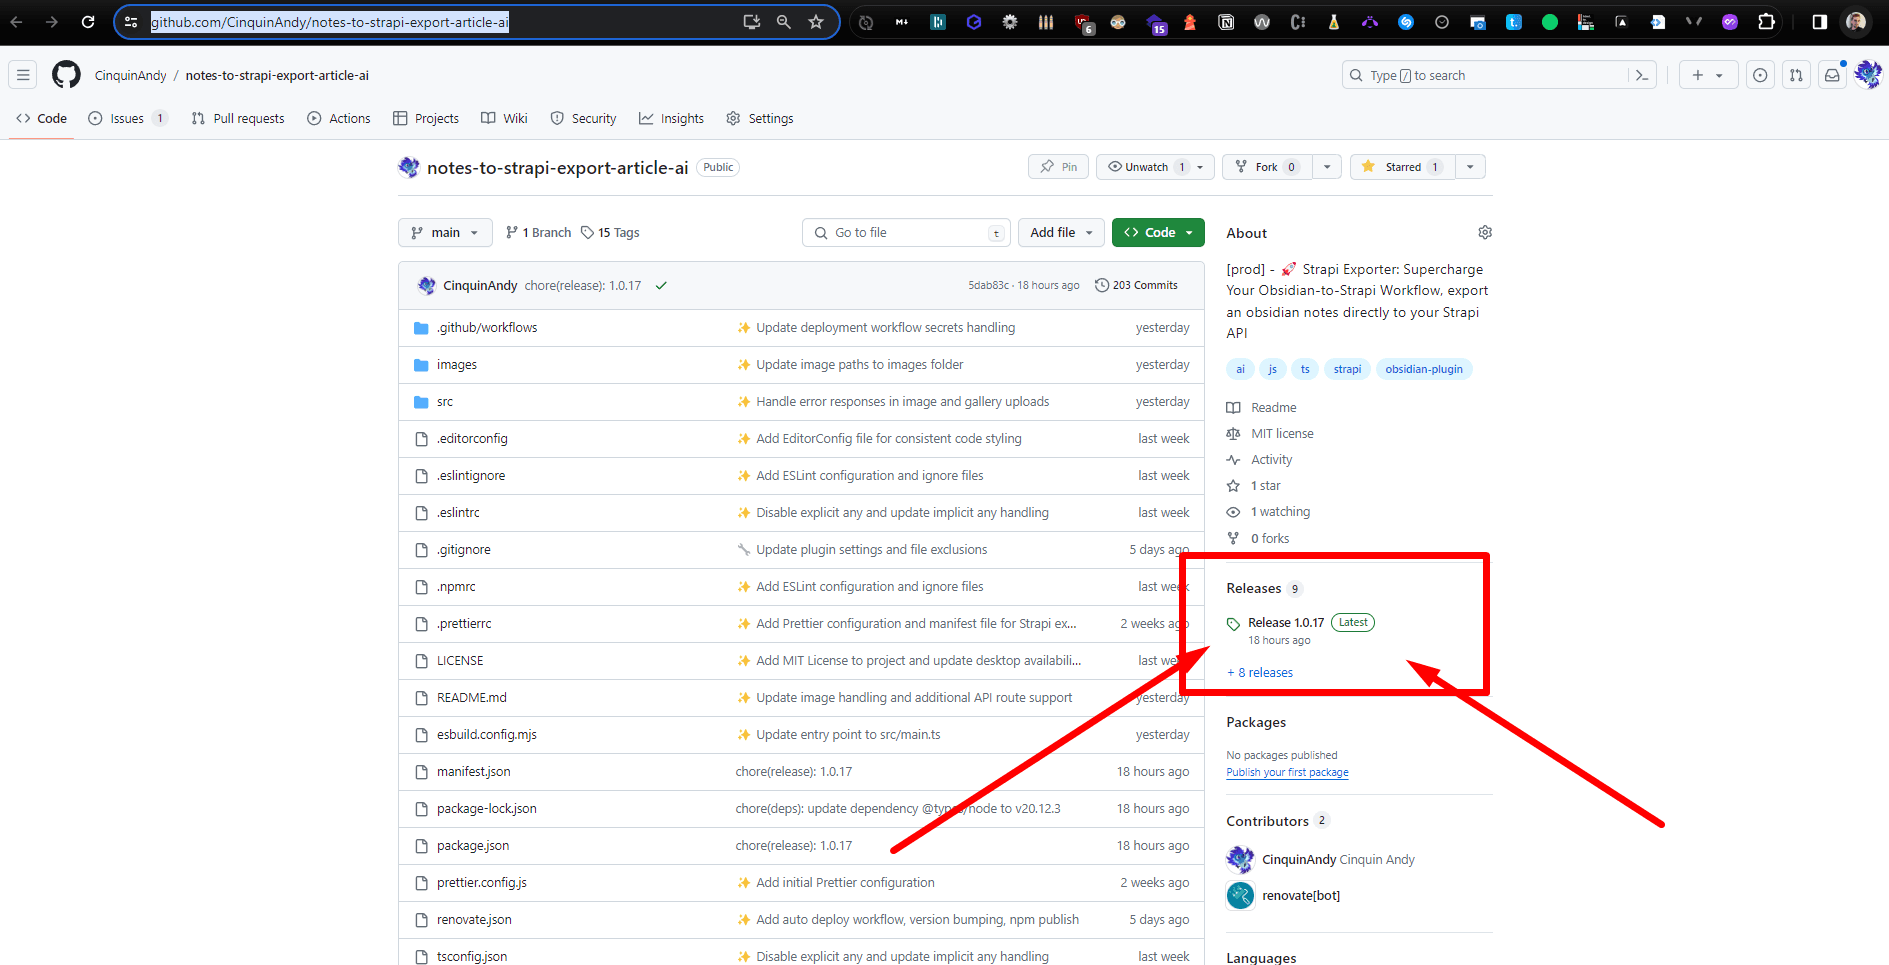
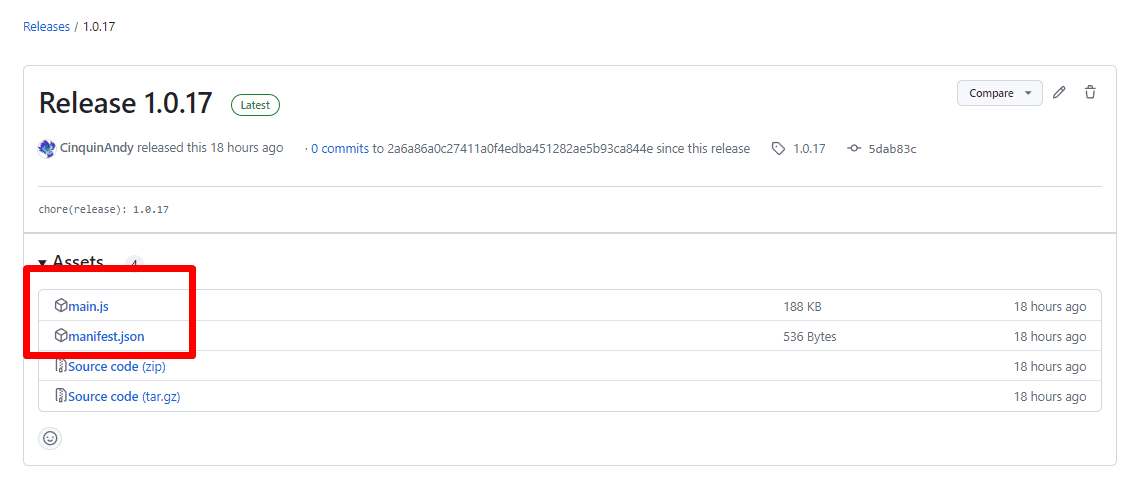
Screenshot of a GitHub repository page showing details about the latest release version labeled as 'Release 1.0.17 (Latest)'
Go to release
Screenshot of software release page showing version 1.0.17 on version control platform with important assets 'main.js' and 'manifest.json' highlighted.
Download main.js & manifest.js, the latest version available.
Then go to the root of our Obsidian (for me it's C:\Users\andyq\Obsidian)
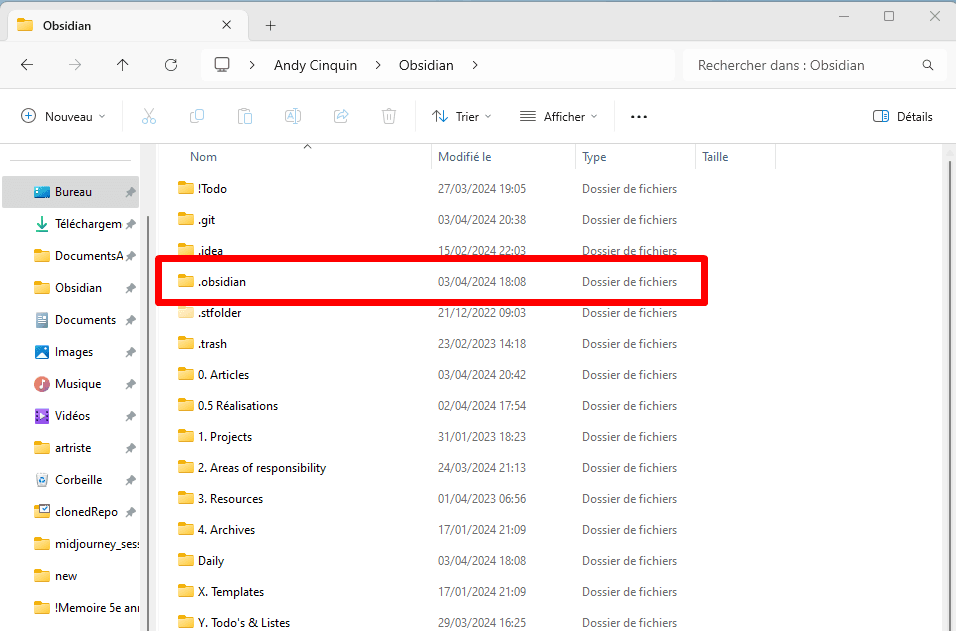
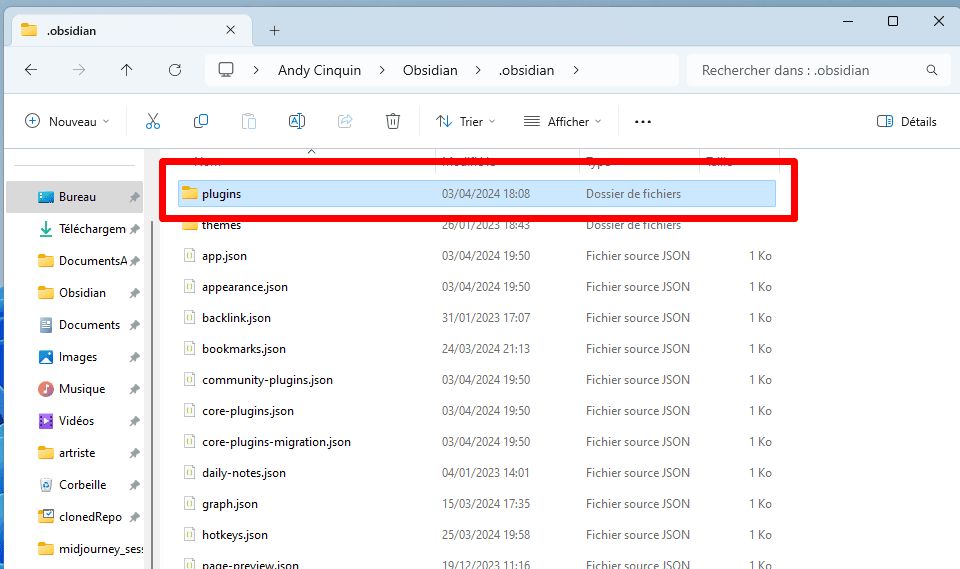
Computer file explorer window displaying a list of folders with .obsidian folder highlighted, along with menu options and other folders
Go to .obsidian
Computer screen displaying a file manager window with a '.obsidian' directory open, highlighting a 'plugins' subfolder. User interface in French.
Then into plugins
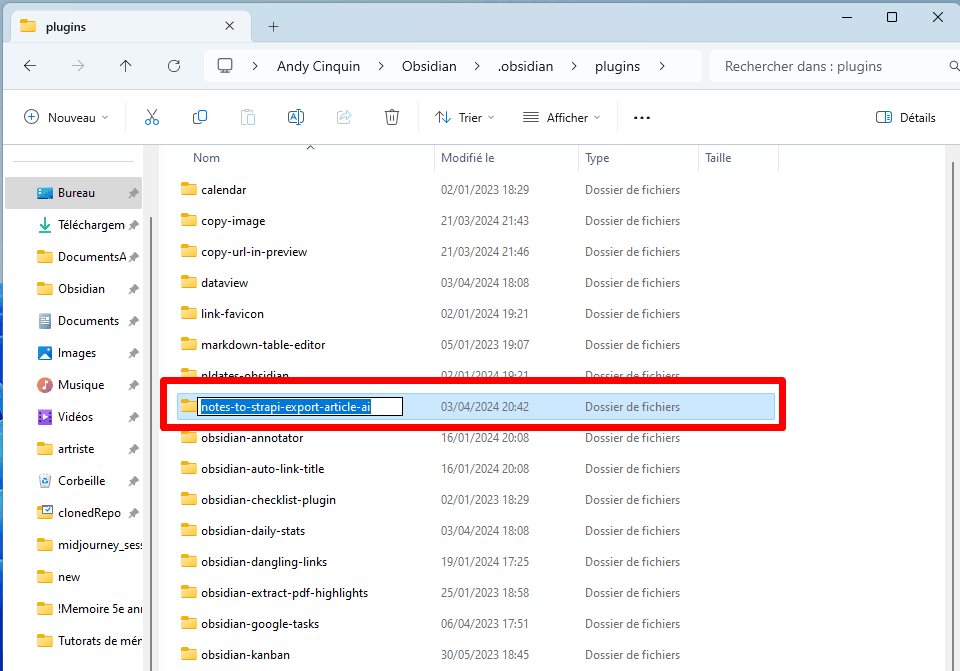
Computer file explorer window displaying folders of plugins for Obsidian software
And create a new folder"notes-to-strapi-export-article-ai".
Computer screen displaying a file explorer window with highlighted files 'main.js' (188 KB) and 'manifest.json' (1 KB)
Then we open our Vault Obsidian and go through the parameters.
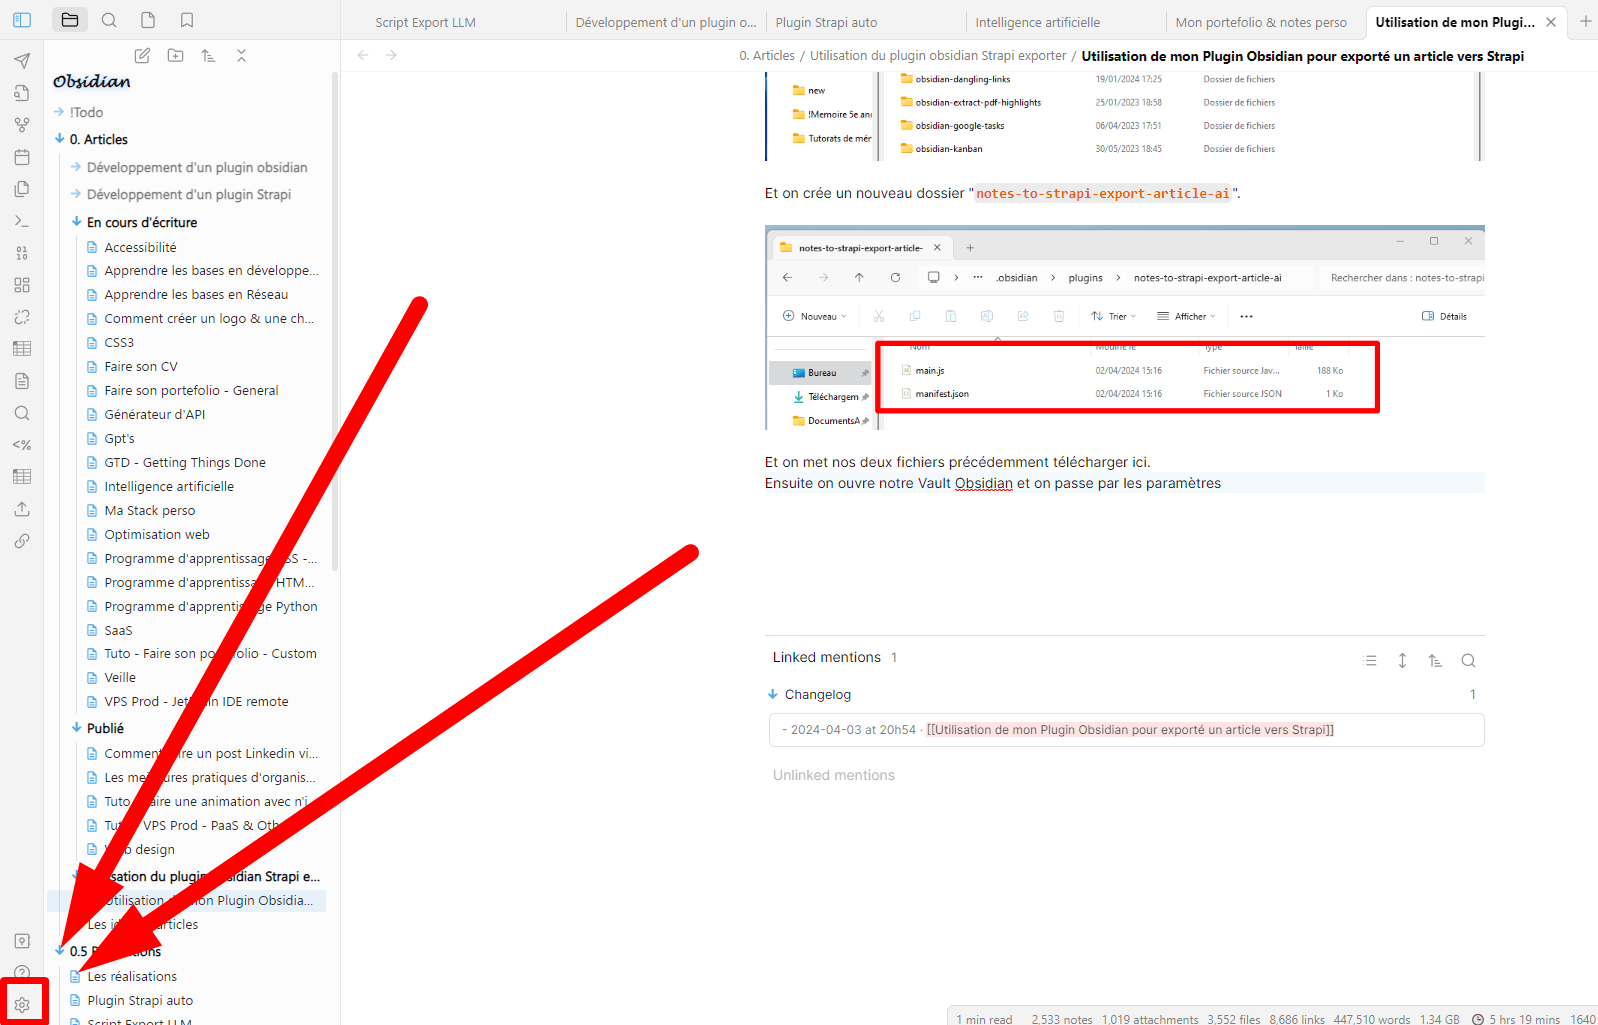
Computer screen showing open applications including a text editor with directory structures and code snippets, highlighted text, and red arrows pointing to a file directory named 'manifest.json'
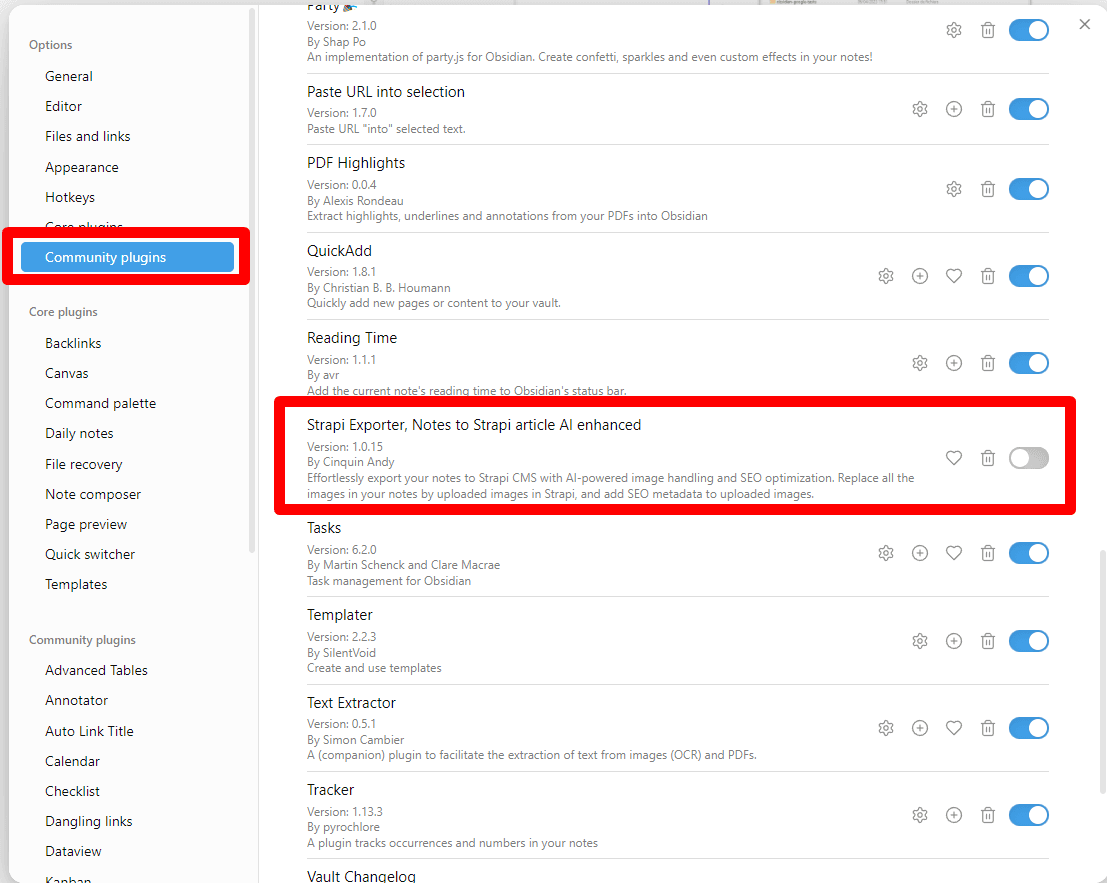
Screenshot of Obsidian note-taking software with highlight on 'Strapi Exporter, Notes to Strapi article AI enhanced' plugin in the Community plugins section
We activate the plugin, then move on to the configuration section.

Configuration

Let's move on to configuration

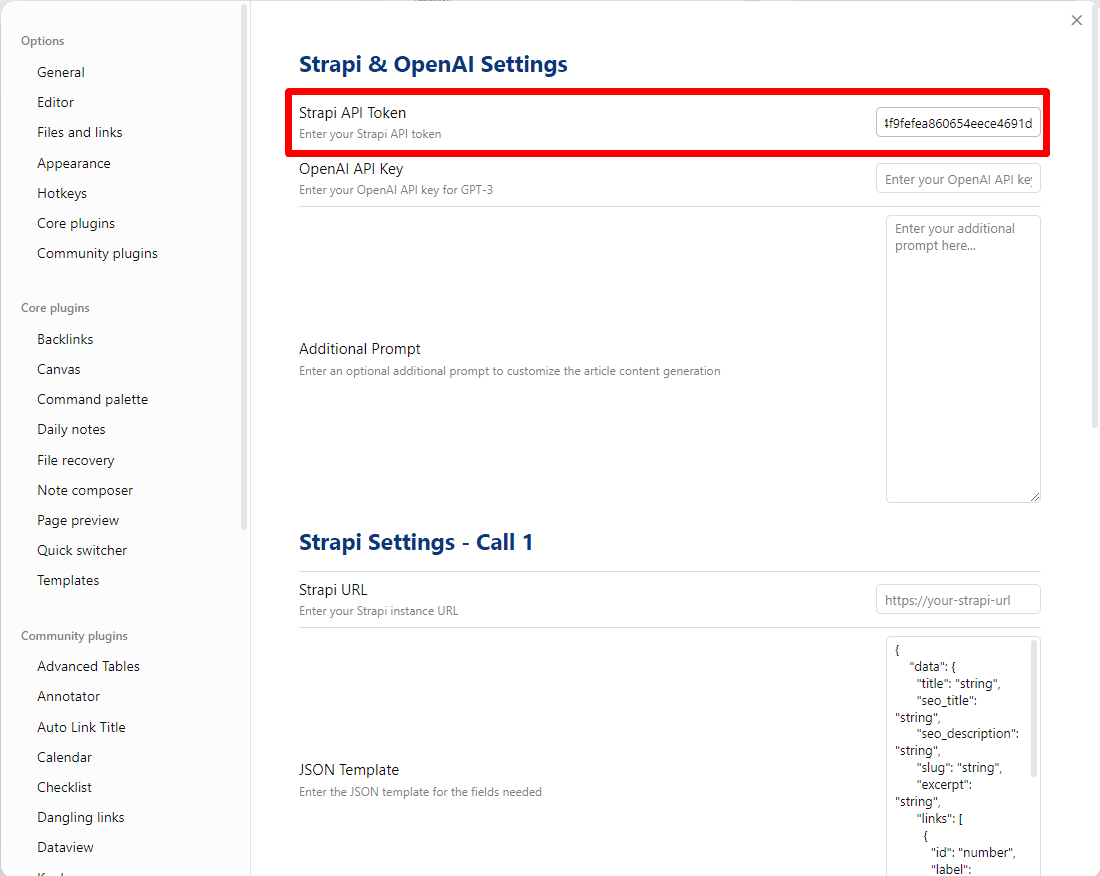
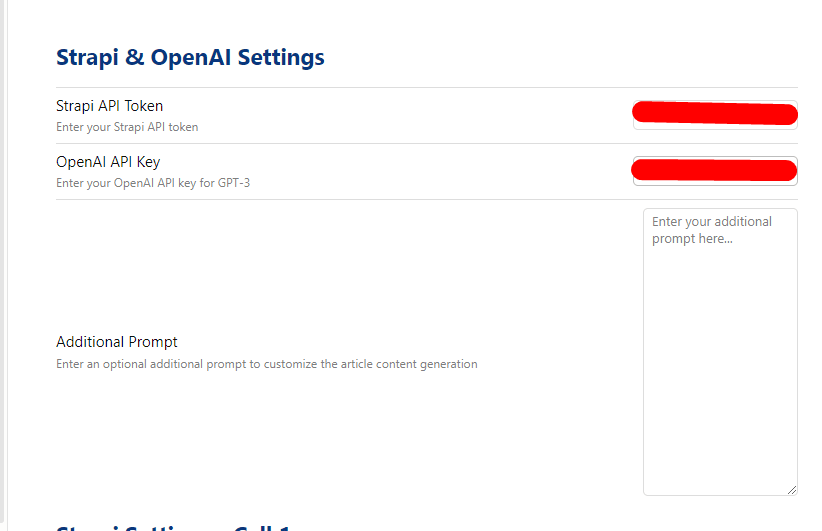
Strapi API Token

We'll start with the Strapi token.
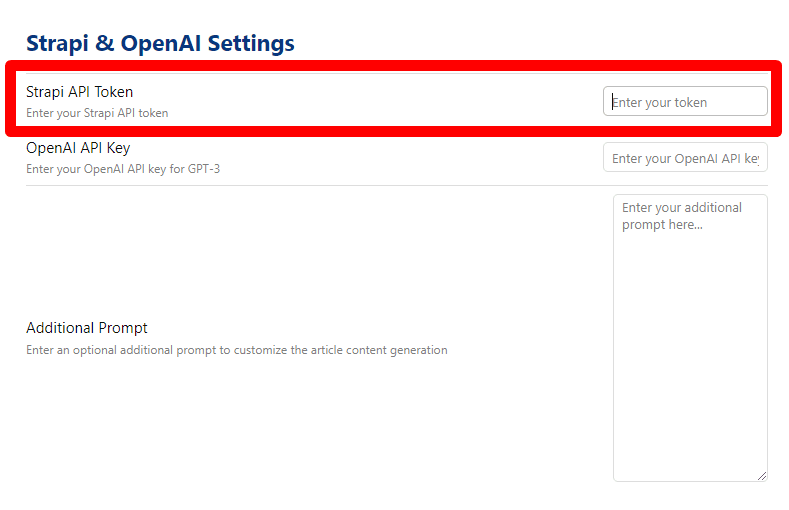
Screenshot of settings page labeled 'Strapi & OpenAI Settings' with input fields for Strapi API Token, OpenAI API Key, and additional content customization prompt. Strapi API Token field highlighted in red.
Go to the Strapi API. In settings, API Token, and create a token
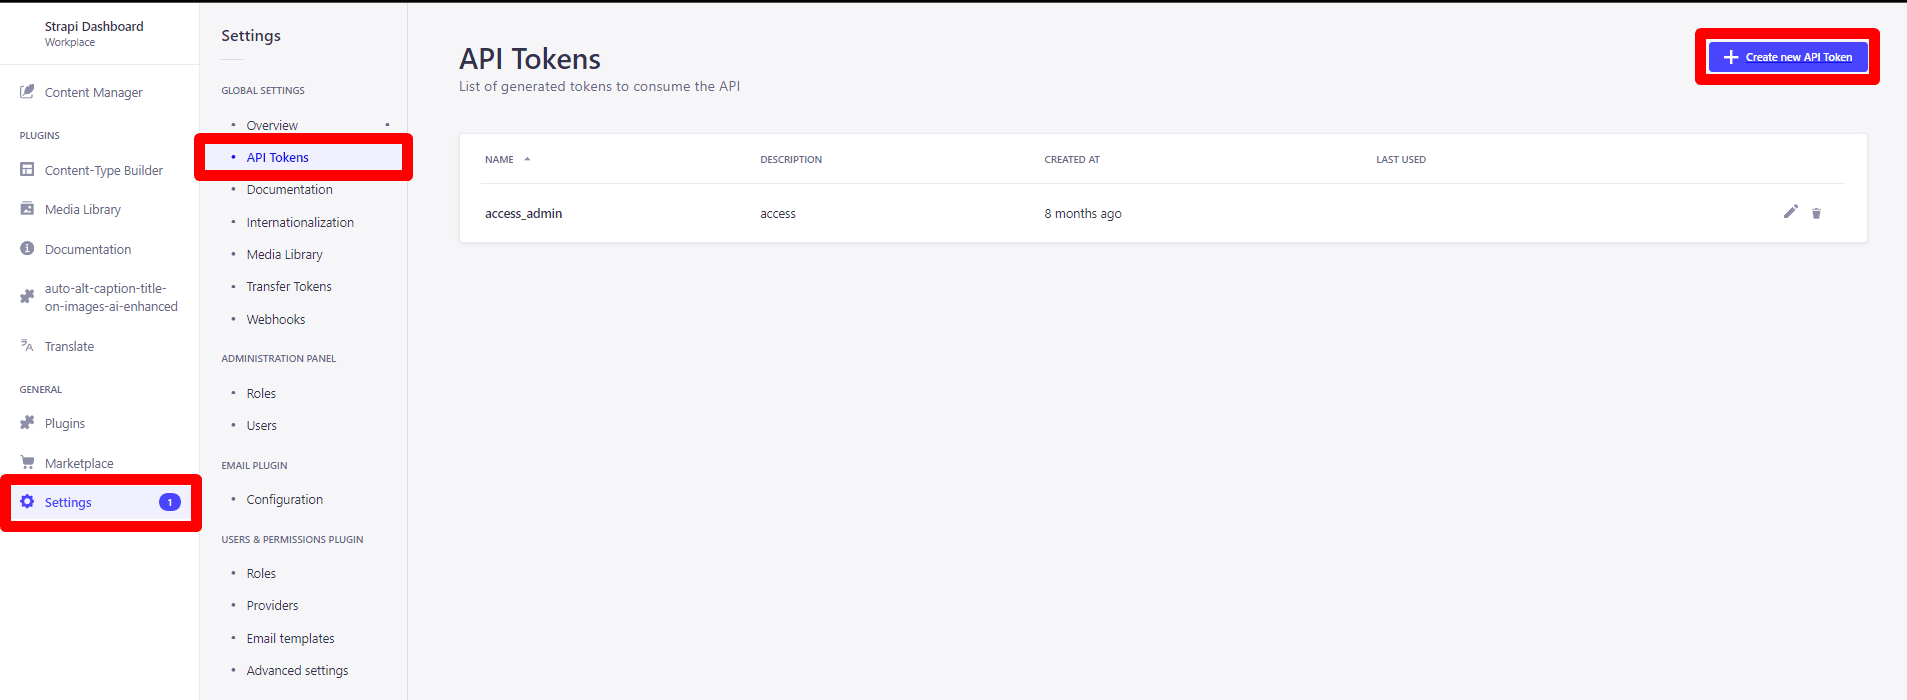
User interface of the Strapi application showing the API Tokens settings page with a list of API tokens named 'access_admin' created 8 months ago.

Simple

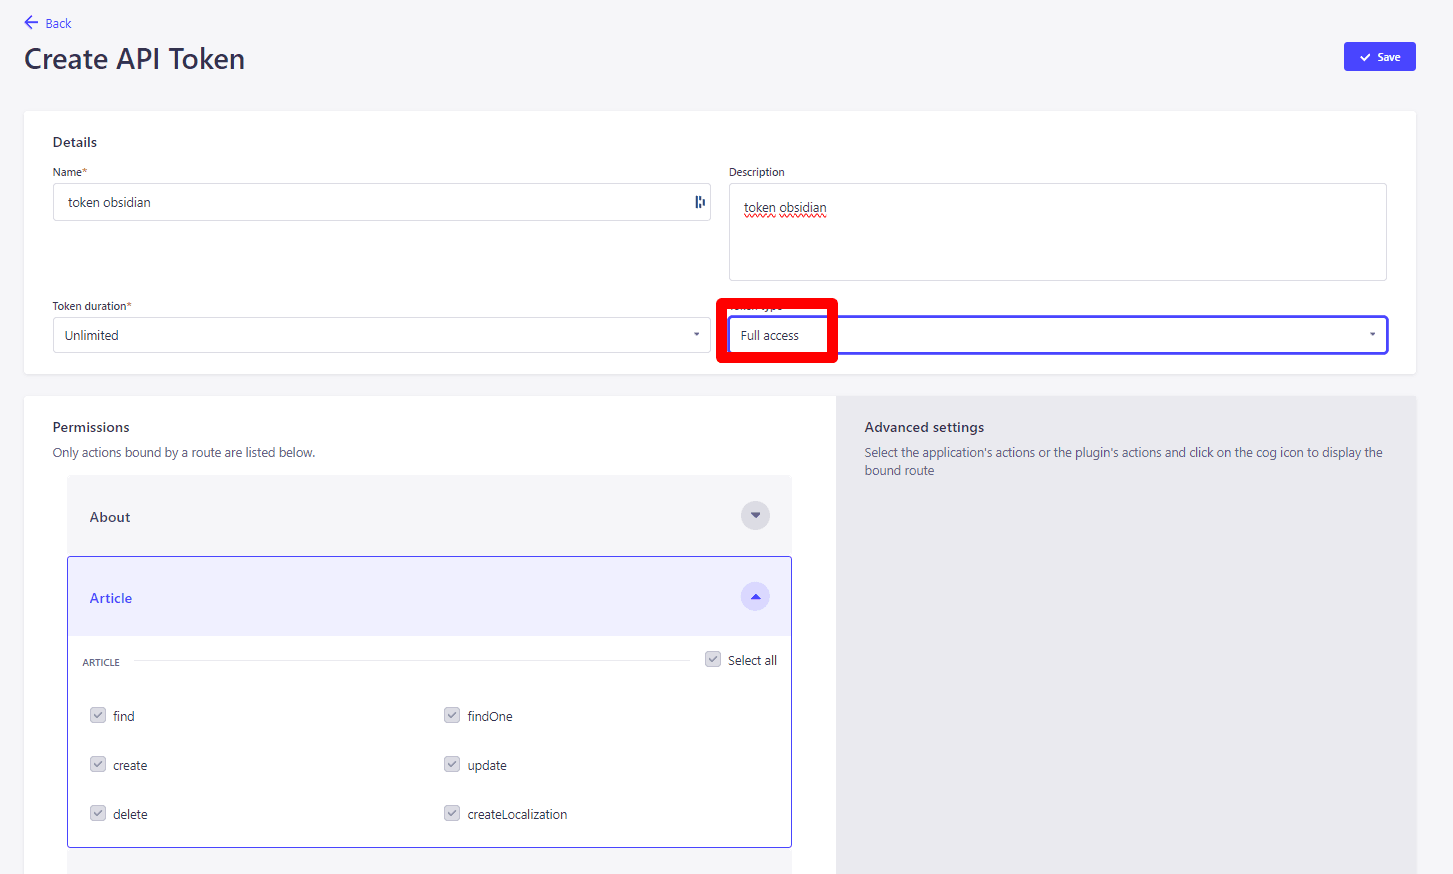
User interface showing a form for creating an API token with fields for name, description, and duration. Full access selected. Permissions section for categories like Article with multiple actions. Save button at top right corner.
Full access, so you don't have to worry about rights.

Advanced (optional)

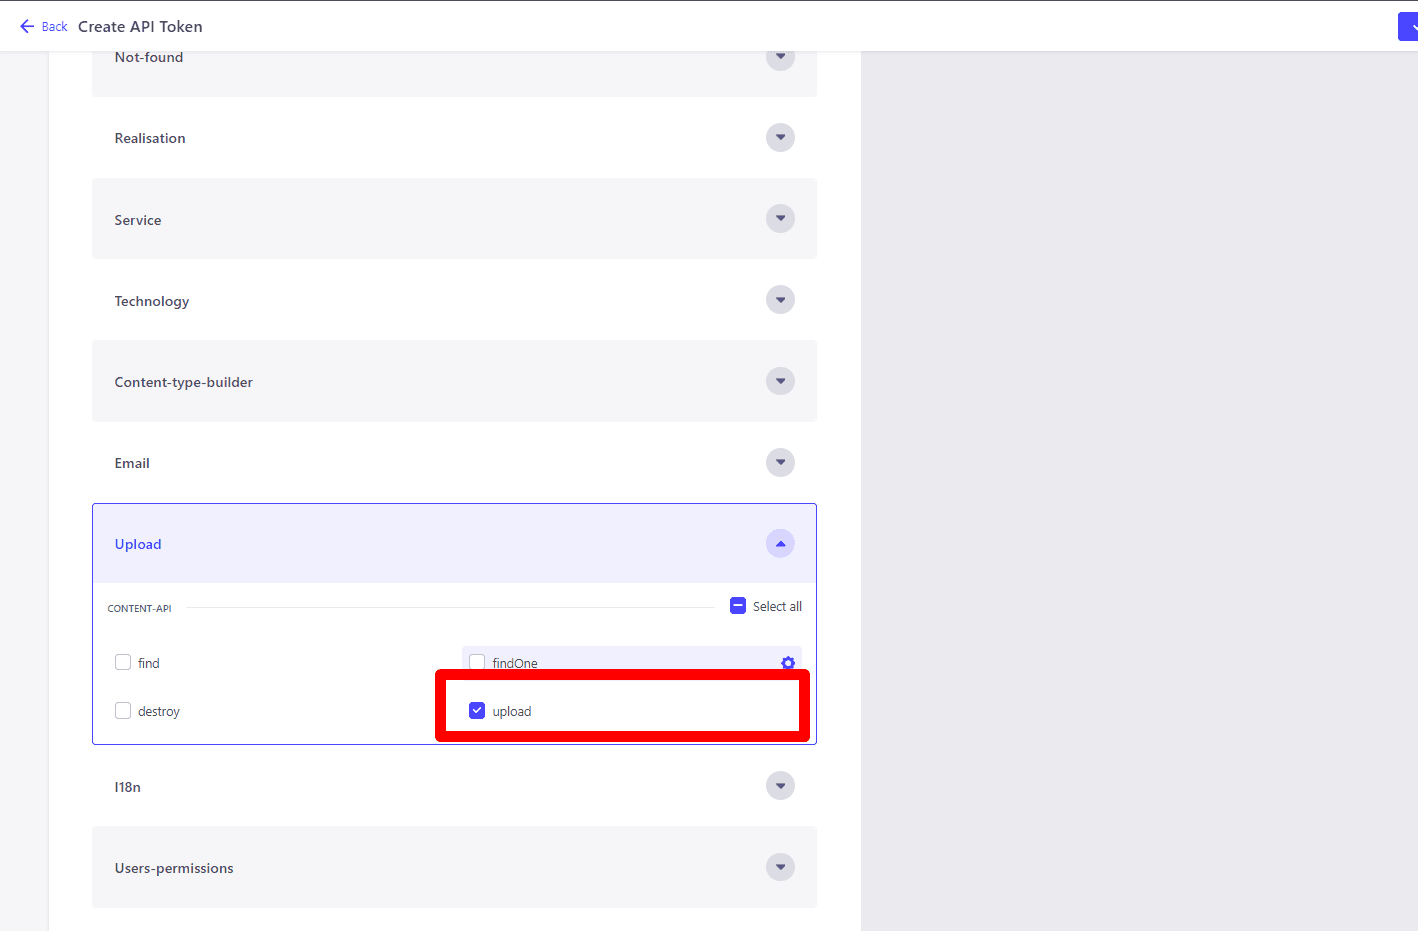
With the rights strictly necessary to create an article, it is also necessary to have image upload rights.
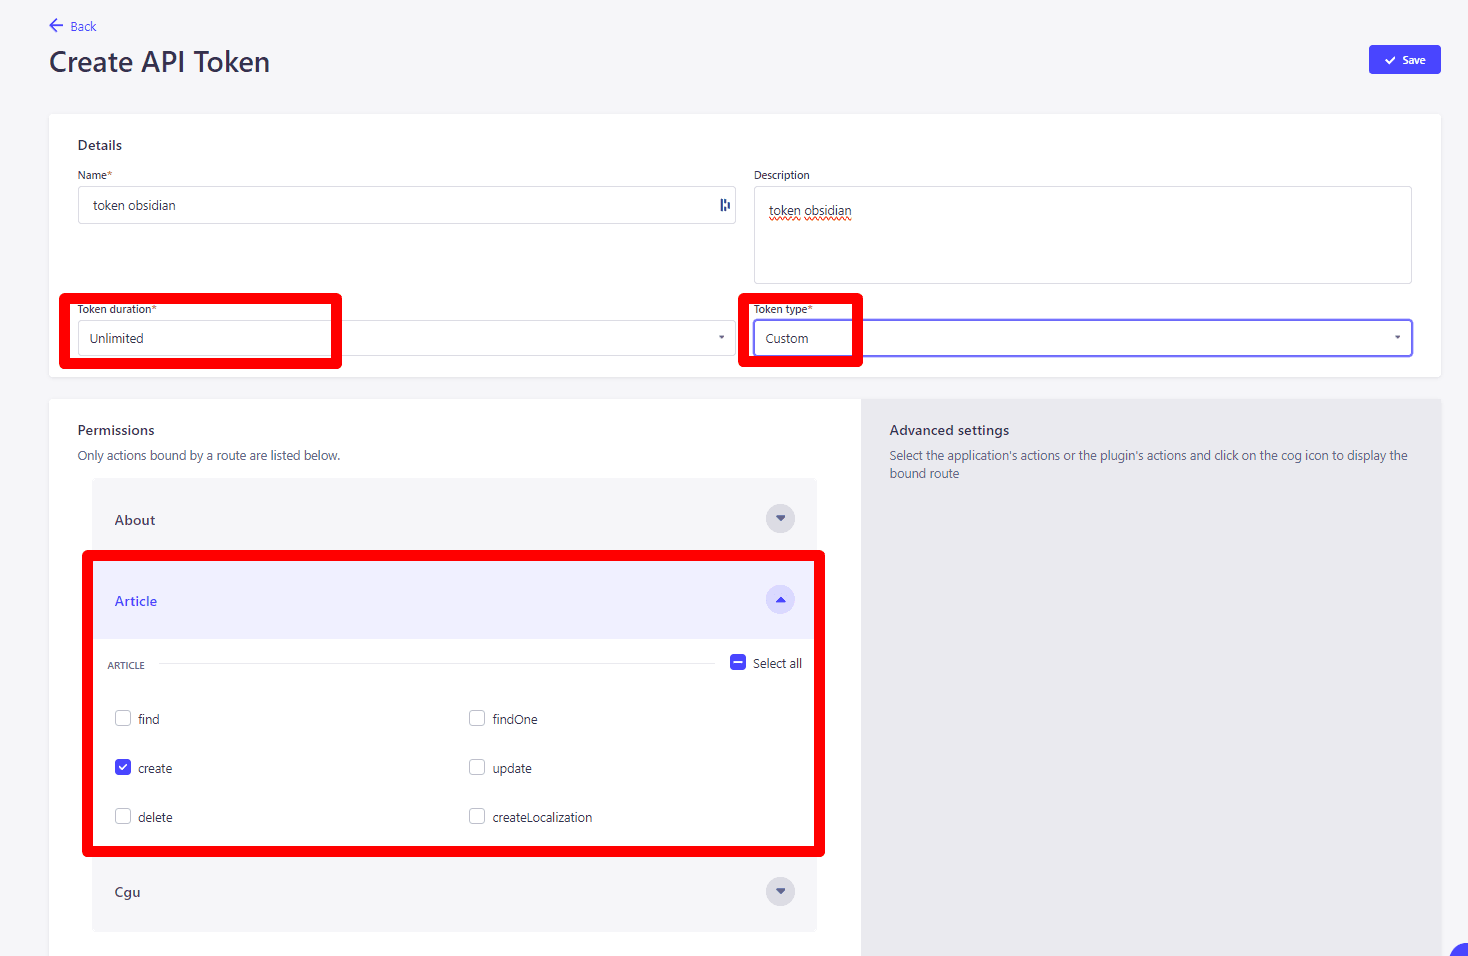
Screenshot of a web interface for creating an API token with fields for name, description, duration, type, and permissions for Article actions.
Computer interface for creating an API token with various permissions settings. Highlighted section shows 'upload' permission within the 'Upload' category.
We take the generated Obsidian token, and put it in our config:
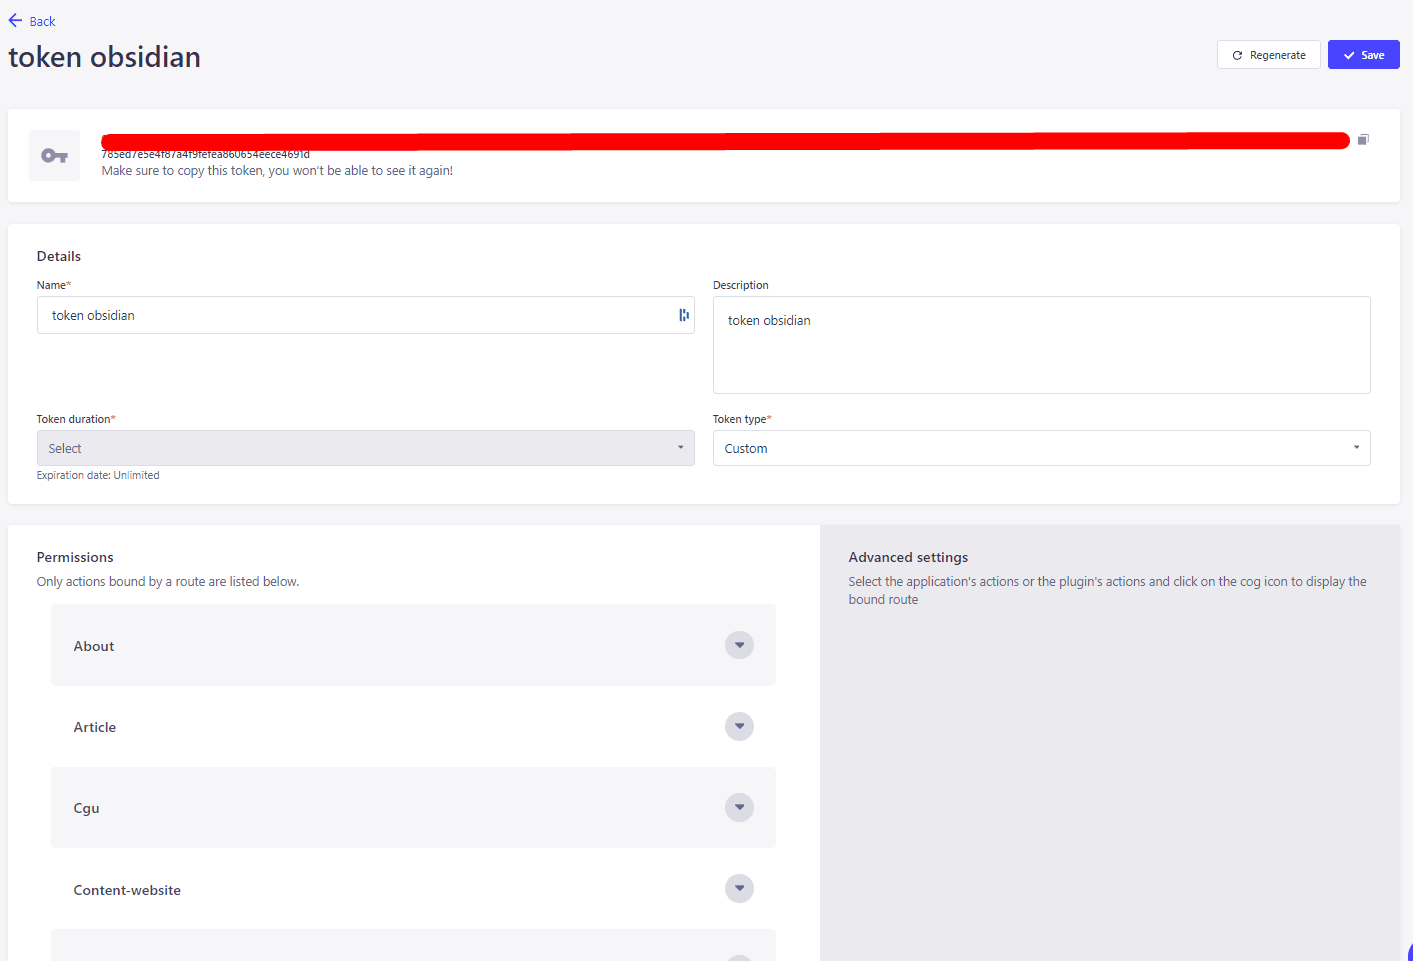
Screenshot of a web interface for creating or editing an access token named 'token obsidian' with fields for token name, description, type, and duration, and permissions settings for various actions.
Software interface displaying settings for Strapi & OpenAI API tokens, content generation customization, Strapi URL, and JSON template

Open AI Settings

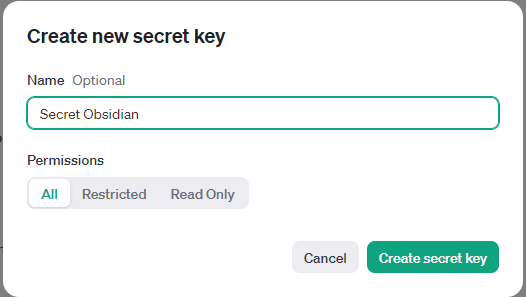
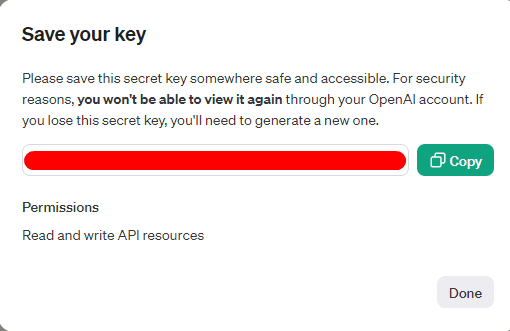
OpenAI PlatformWe'll look for a secret in the OpenAI config.
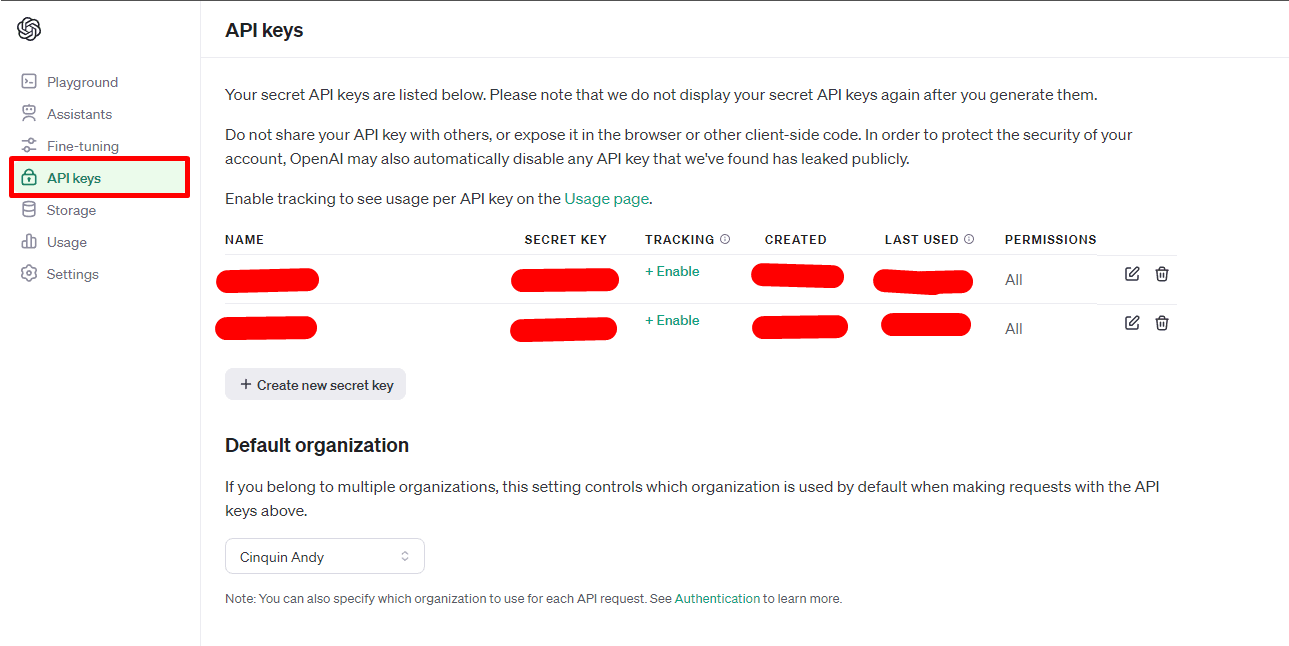
Webpage interface for managing API keys with various key management options and settings
Create our secret here,
User interface for creating a new secret key with options for naming and setting permissions
Dialog box titled 'Save your key' with cautionary message to save secret key securely. Redacted area for key, 'Copy' button, and permissions note for reading and writing API resources.
User interface for configuring Strapi & OpenAI settings with input fields for API tokens and additional prompts
Set our key here

Additional prompt

Complete with an additional prompt if necessary, to specify additional information. Here, we're free to give ChatGPT additional information to get better results. For example, in my configuration I put this :
If present, the locale needs to be 'fr' and the content in French, and generate at least 8 tags if present in the schema too. If present, the rank needs to be 999. Meta Description: Write an attractive meta description including the main keyword, which encourages clicking on the article from the search results. Optimization for Readers and Search Engines: Write content that is not only optimized for search engines but also engaging and informative for readers. The content must answer their questions or solve a problem.

Strapi settings - call 1

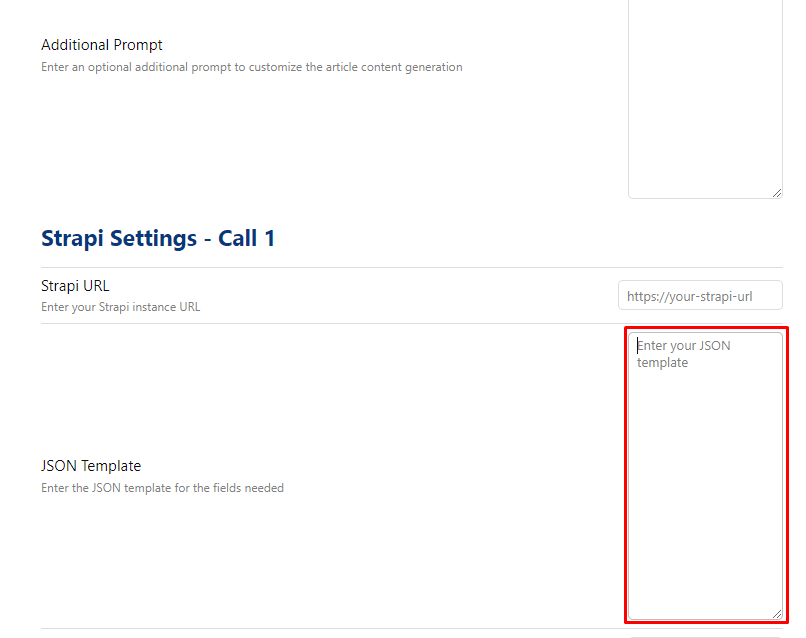
Strapi URL ( call 1 )
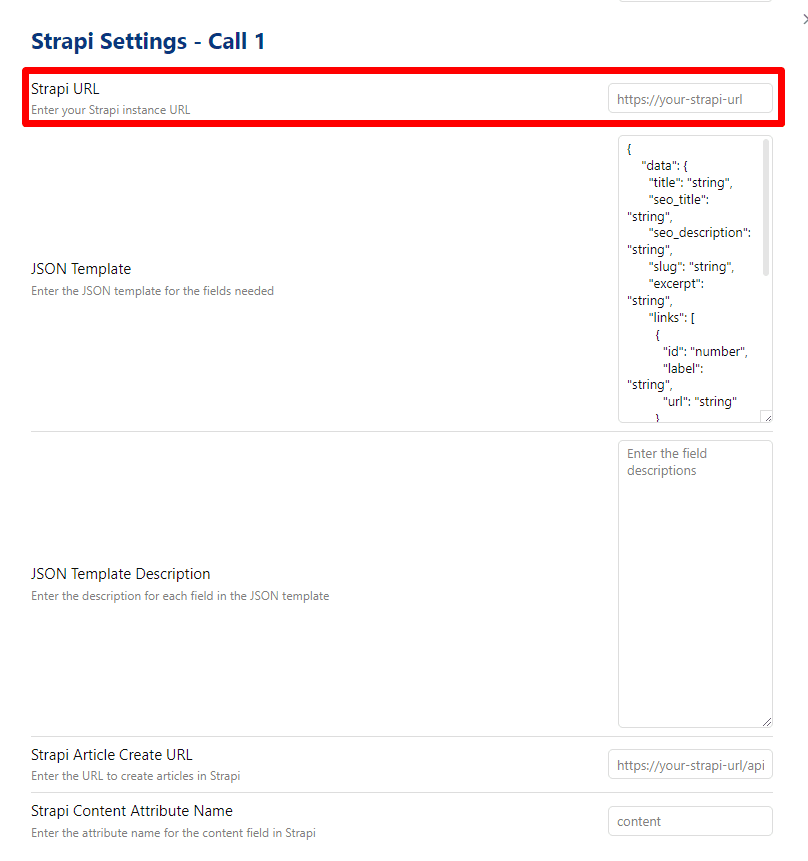
Graphical user interface for setting up Strapi integration, featuring fields for Strapi instance URL, JSON template, JSON template description, Strapi article creation URL, and Strapi content attribute name.
We're now going to configure the first call (the one that will create our articles, for example).
Screenshot of a dashboard displaying the documentation section of a content management system with version 1.0.0 and last generated timestamp.
To do this, go to documentation, then Open Documentation
We retrieve the general URL of our Strapi, which for me is:
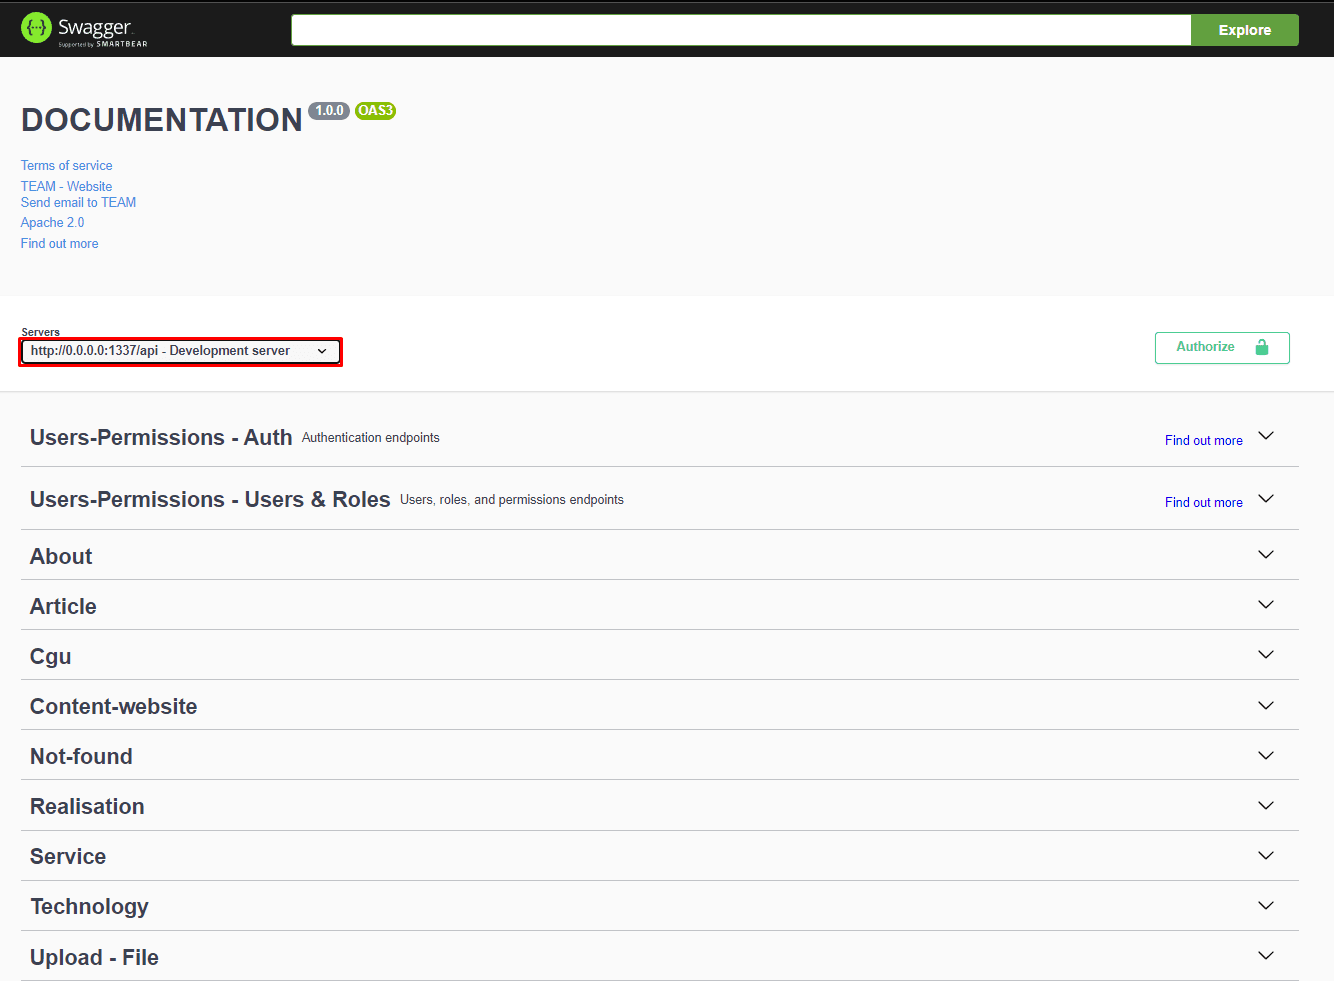
Screenshot of Swagger documentation for API endpoints including Users-Permissions, About, Article, and Upload - File
And we replace the local address displayed by the remote address, which for me is: https://api.andy-cinquin.fr

Json template config

Web interface screenshot showing Strapi Settings input fields for Strapi URL and JSON Template. JSON Template input field highlighted with red border.
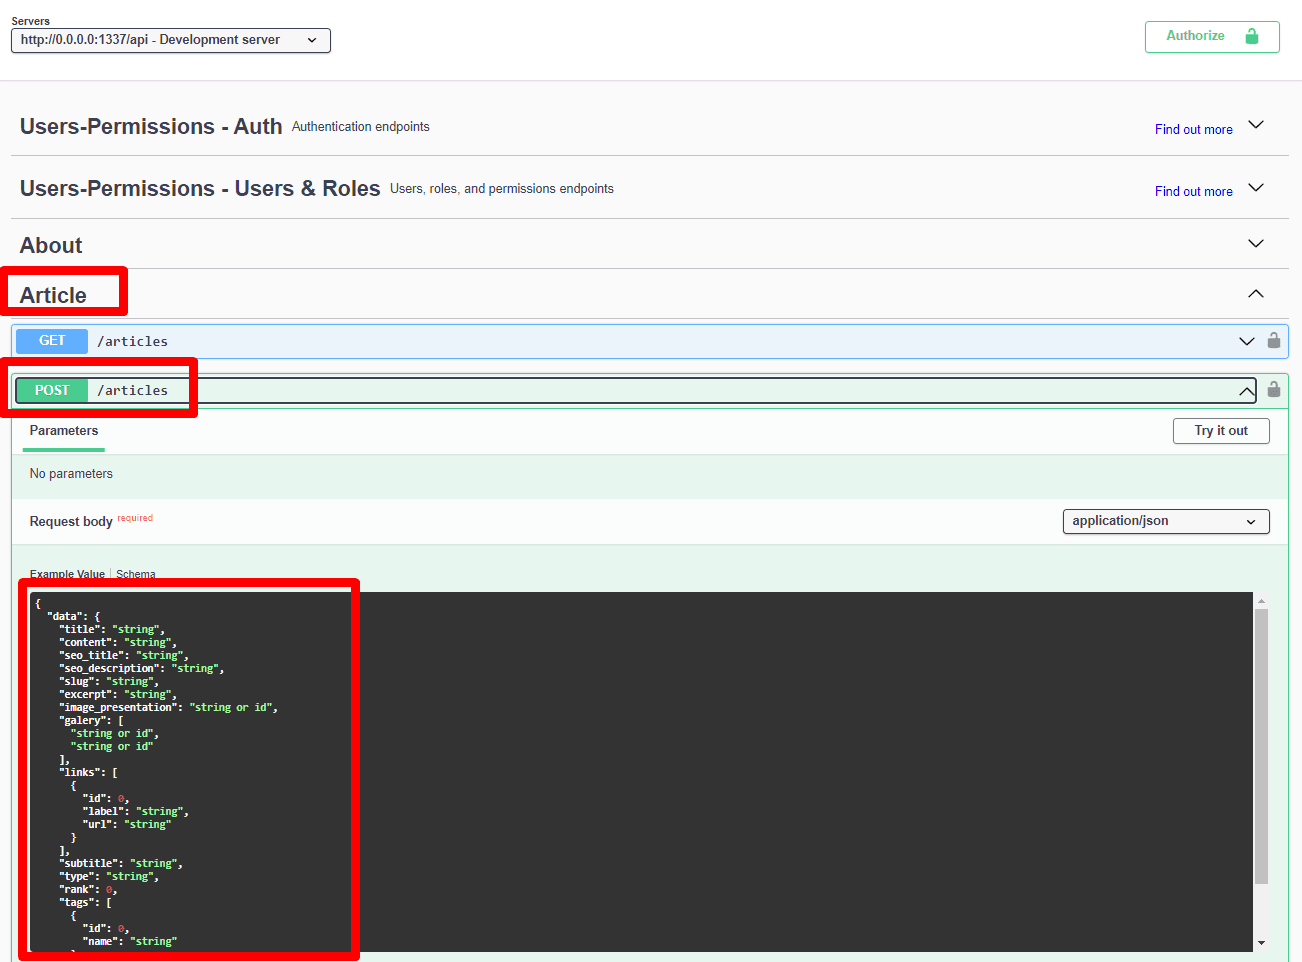
Web interface for API documentation and interaction with Swagger UI or similar tool, showcasing GET and POST requests for '/articles' endpoint
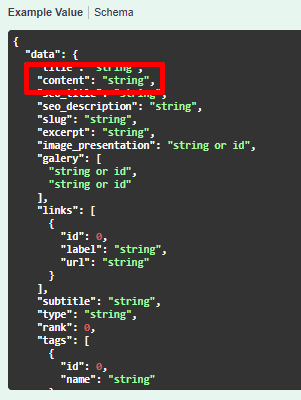
And we retrieve from our swagger on the Strapi side, the data schema we need to send. We delete the links to other cascading tables (sorry! it's not yet implemented!) And we delete the "content" part (the part that will correspond to the main content of your article / realization ), as well as the images for the moment.
This gives me :
{ "data": { "title": "string", "seo_title": "string", "seo_description": "string", "slug": "string", "excerpt": "string", "links": [ { "id": "number", "label": "string", "url": "string" } ], "subtitle": "string", "type": "string", "rank": "number", "tags": [ { "id": "number", "name": "string" } ], "locale": "string" } }

Json template config description

Next, we'll configure the rest of our plugin with the "description" section. We use the same template, but describe what our data should look like, giving details and indications. In natural language (managed by an LLM, incredible isn't it?)
{ "data": { "title": "Title of the item, as a short string", "seo_title": "SEO optimized title, as a short string", "seo_description": "SEO optimized description, as a short string", "slug": "URL-friendly string derived from the title", "excerpt": "A short preview or snippet from the content", "links": "Array of related links with ID, label, and URL", "subtitle": "Subtitle or secondary title, as a short string", "type": "Category or type of the item, as a short string", "rank": "Numerical ranking or order priority, as a number", "tags": "Array of associated tags with ID and name", "locale": "Locale or language code, as a short string" } }
It looks like this to me!

Strapi create url

User interface displaying Strapi Article Create URL and Strapi Content Attribute Name text input fields filled with specific values.
This is the complete url to the creation of an article or realization, for me it's https://api.andy-cinquin.fr/api/articles

Strapi content attribute name call

Screenshot of a JSON data structure template with keys like 'title,' 'content,' 'seo description,' highlighting key-value pairs.
For me, the main content of my article is found here, I just indicate the name of this field here (I do this to save tokens in API calls to OpenAI!).

Optional (image)

Screenshot of user interface showing Main Image Settings with Enable Main Image option toggled off
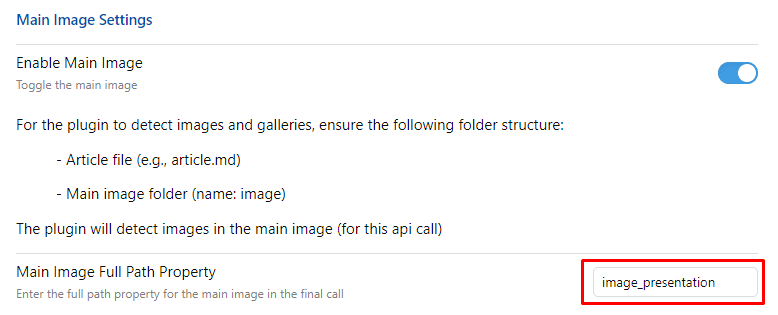
If you have an image, for example a background, or an illustration to add to your API at the same time, and you want to do everything at once, this is a good method.
To be able to use it, you need to have a folder in your Obsidian called "image"
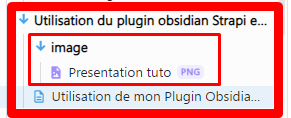
Computer interface displaying a dropdown menu labeled 'Utilisation du plugin obsidian Strapi', with an expanded item showing an image file named 'Presentation tuto' in PNG format.
The architecture should look like this to be able to use a single image
Computer interface displaying Main Image Settings with enable option and full path property field highlighted in red box

Optional (gallery)

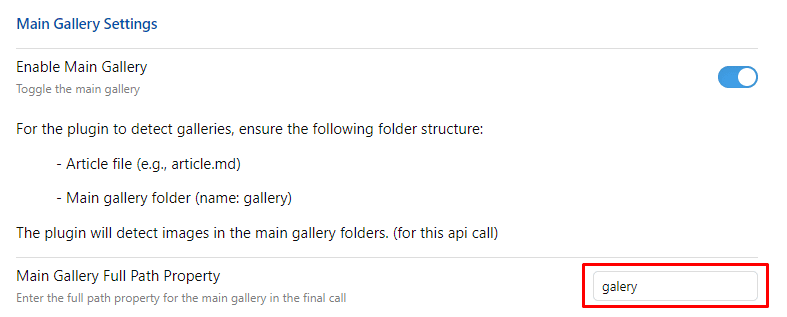
Screenshot of Main Gallery plugin settings page showing options to enable the gallery and folder structure instructions
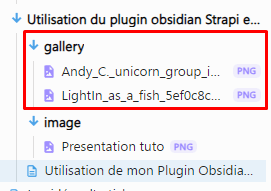
Same system as for images, but with "gallery".
Computer screen displaying a file navigation window with a folder named 'gallery' expanded to reveal PNG image files named 'Andy_C_unicorn_group_i…' and 'LightIn_as_a_fish_5ef0c8c8c…'. A red box highlights the folder and its contents.

Configuration call 2 ( optional )

You can also configure a second route, in the same way
-> You'll need to restart your application when you activate your second route!

Using the application
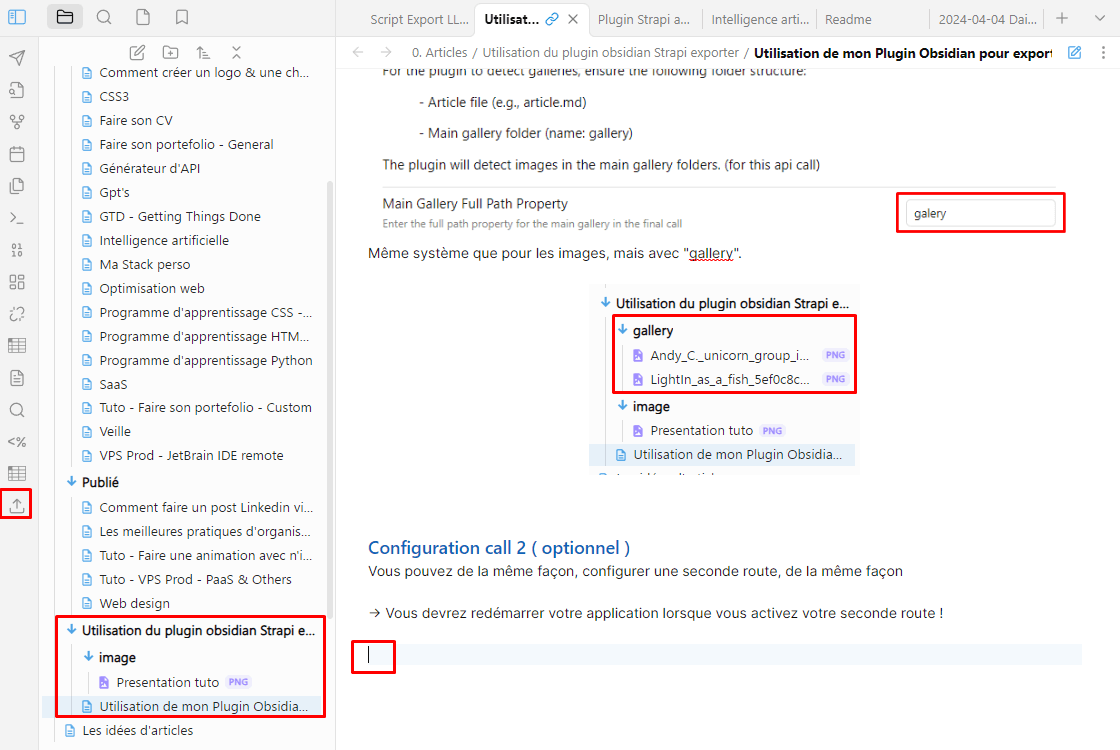
Computer screen displaying a note-taking application with a folder tree on the left and a text document in French on the right. Red boxes highlight 'gallery' field and corresponding folder in the interface.
Once all this is configured, simply click on the little upload icon on the left of the sidebar to upload the article itself.
And that's it, let the magic happen!


Thank you for your visit, feel free to contact me for any information, quote or collaboration proposal. I will be happy to answer you as soon as possible.
Did you like this article? Feel free to share it!

DEVELOP YOUR PROJECTS TOGETHER

An idea, a project? I'm here to answer your questions and help you.
I'd be delighted to discuss your project with you!