Guide: Obsidian plug-in for exporting notes to Strapi
Posted on - April 4, 2024 by Andy Cinquin
Obsidian pluginStrapiExport notesStep-by-step configurationObsidianAPI StrapiOpenAIContent export
Obsidian Plugin for exporting a note to Strapi
In this article, we'll take a step-by-step look at how to use my Obsidian Plugin in Strapi.
The elements required are :
- An item you want to publish, written in your Obsidian Vault
- An API online, and available.
- Remote access from the Internet to your API possible (local access won't work!).
- An OpenAI key.
Tuto
When I create this article, I'm going to go through the configuration of this plugin with you. First step, install the plugin:🚀 Strapi Exporter: Supercharge Your Obsidian-to-Strapi Workflow, export an obsidian notes directly to your Strapi API
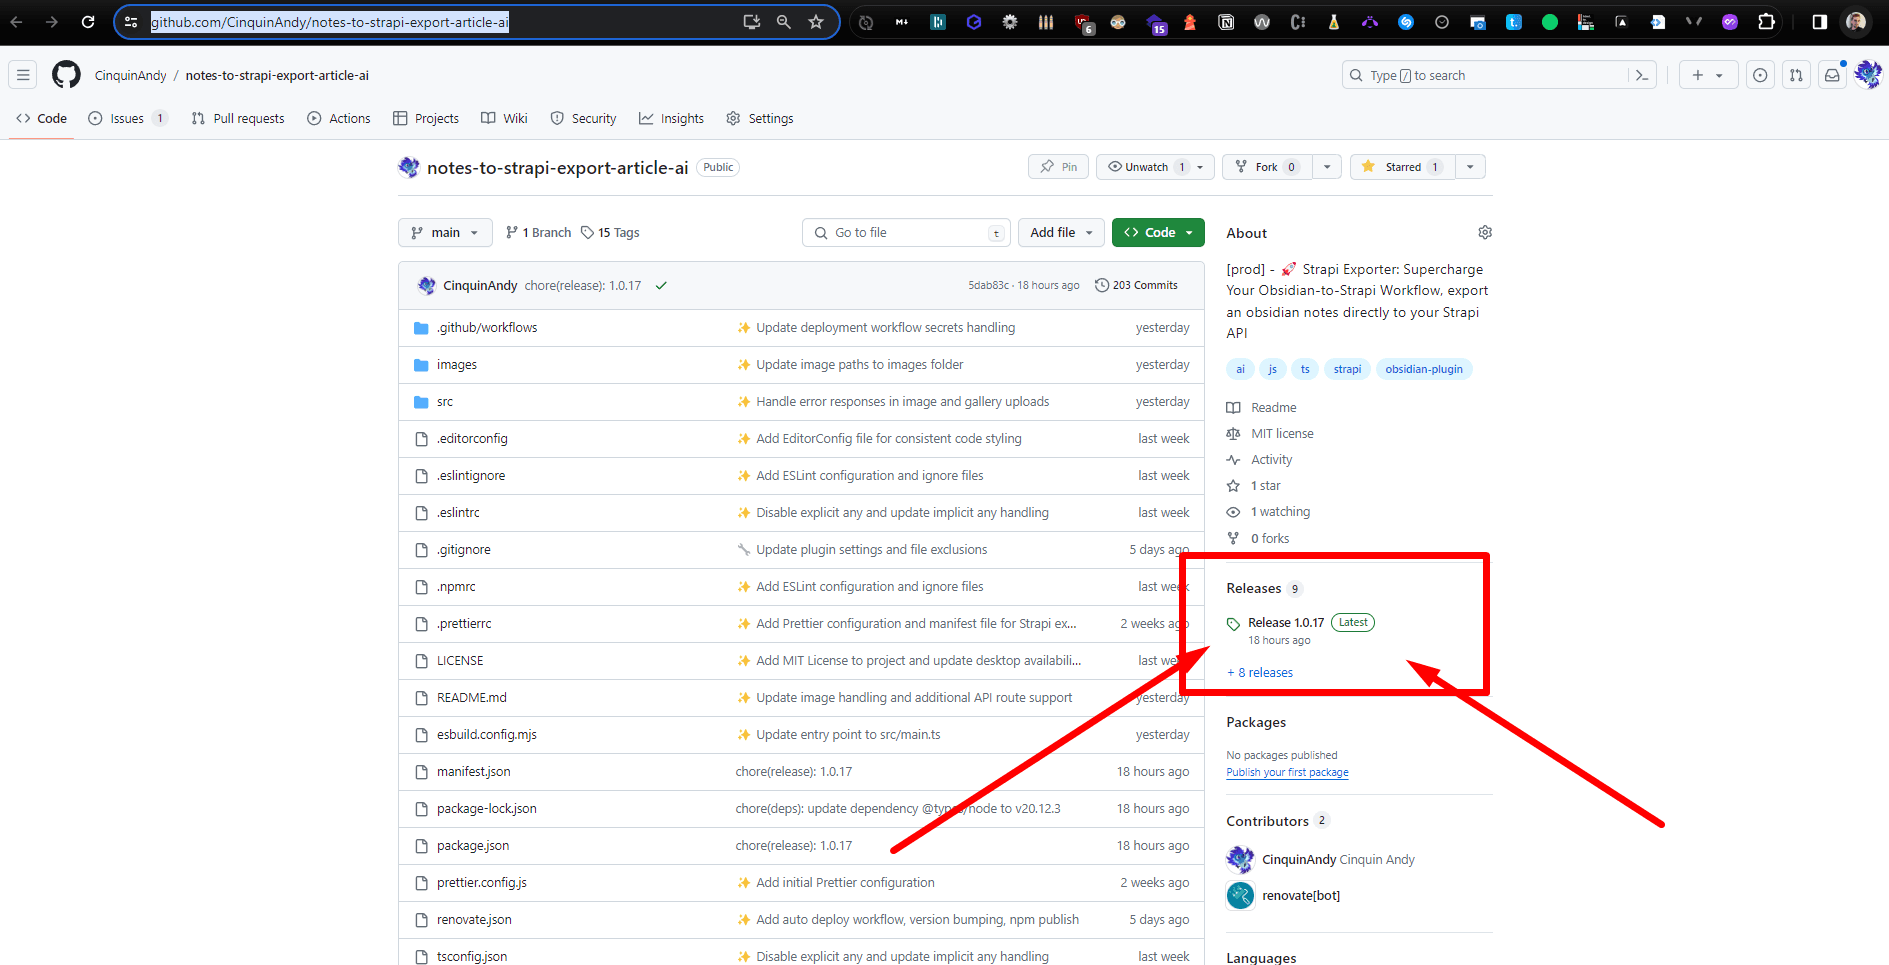
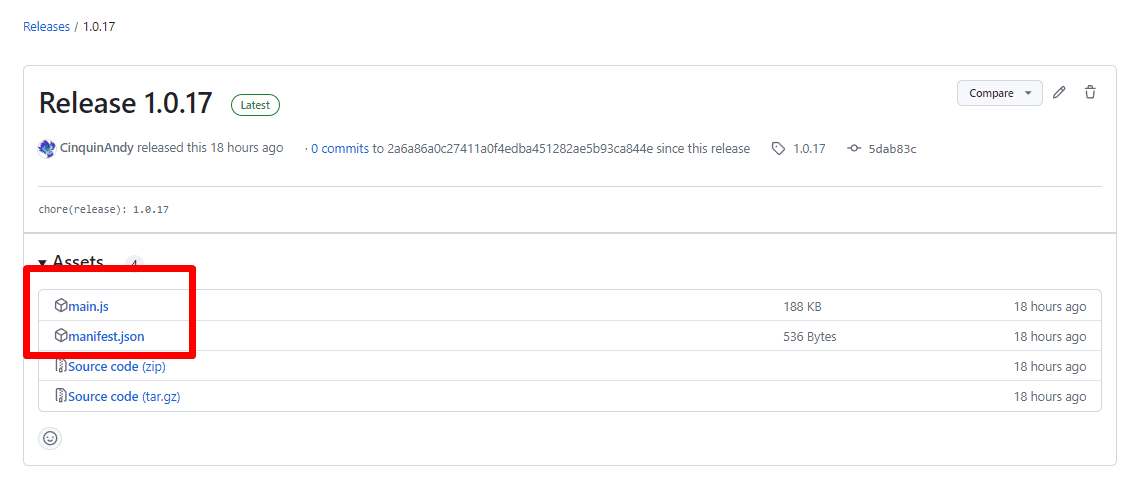
Go to release
Then go to the root of our Obsidian (for me it's 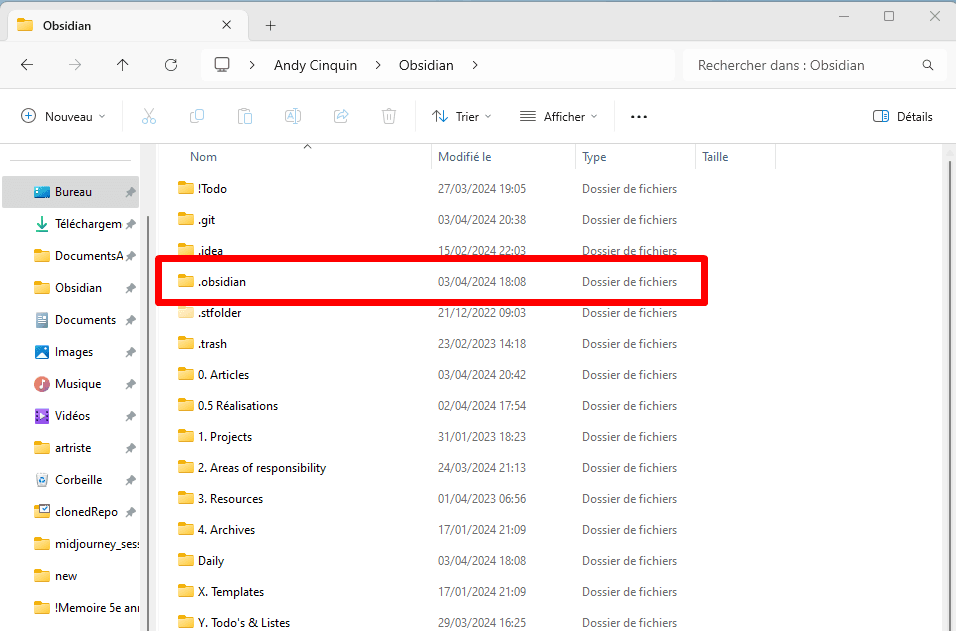
C:\Users\andyq\Obsidian)Go to .obsidian
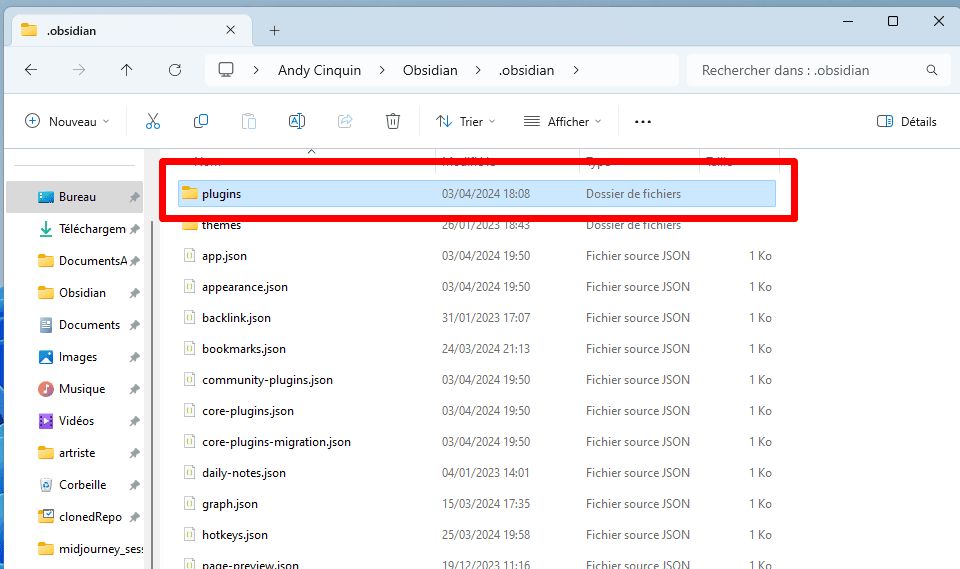
Then into plugins
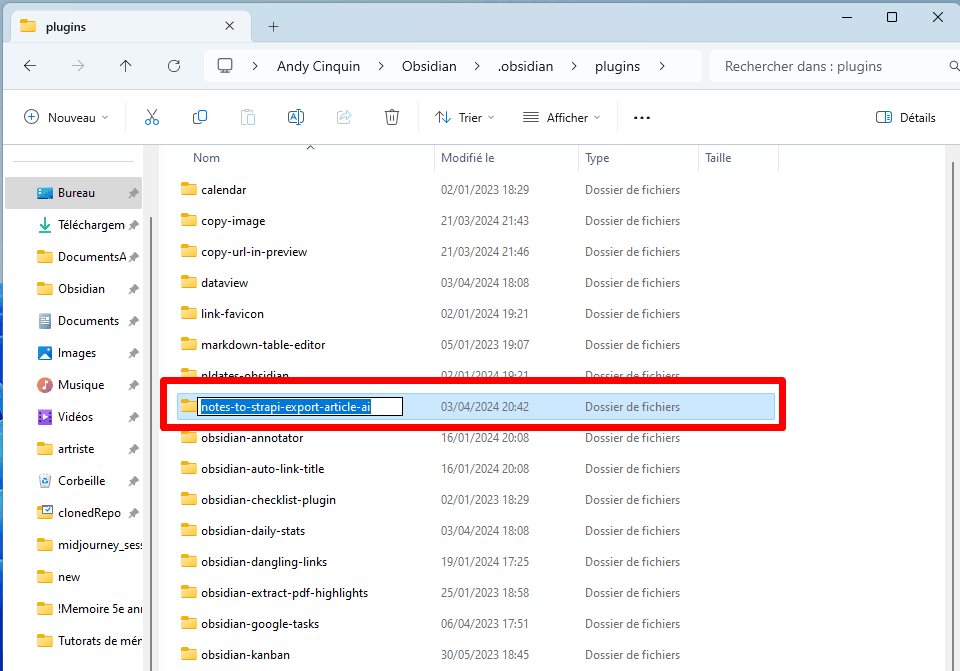
And create a new folder
"notes-to-strapi-export-article-ai".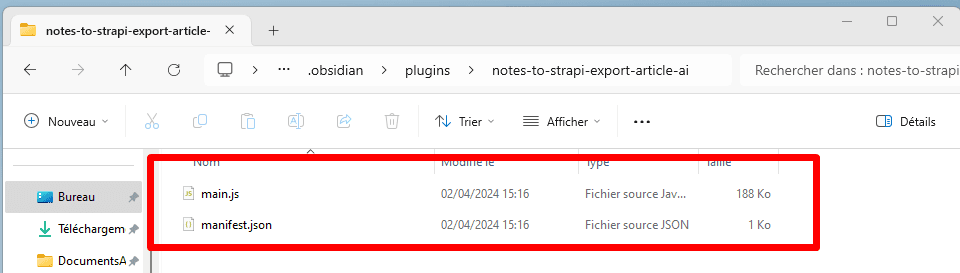
Then we open our Vault Obsidian and go through the parameters.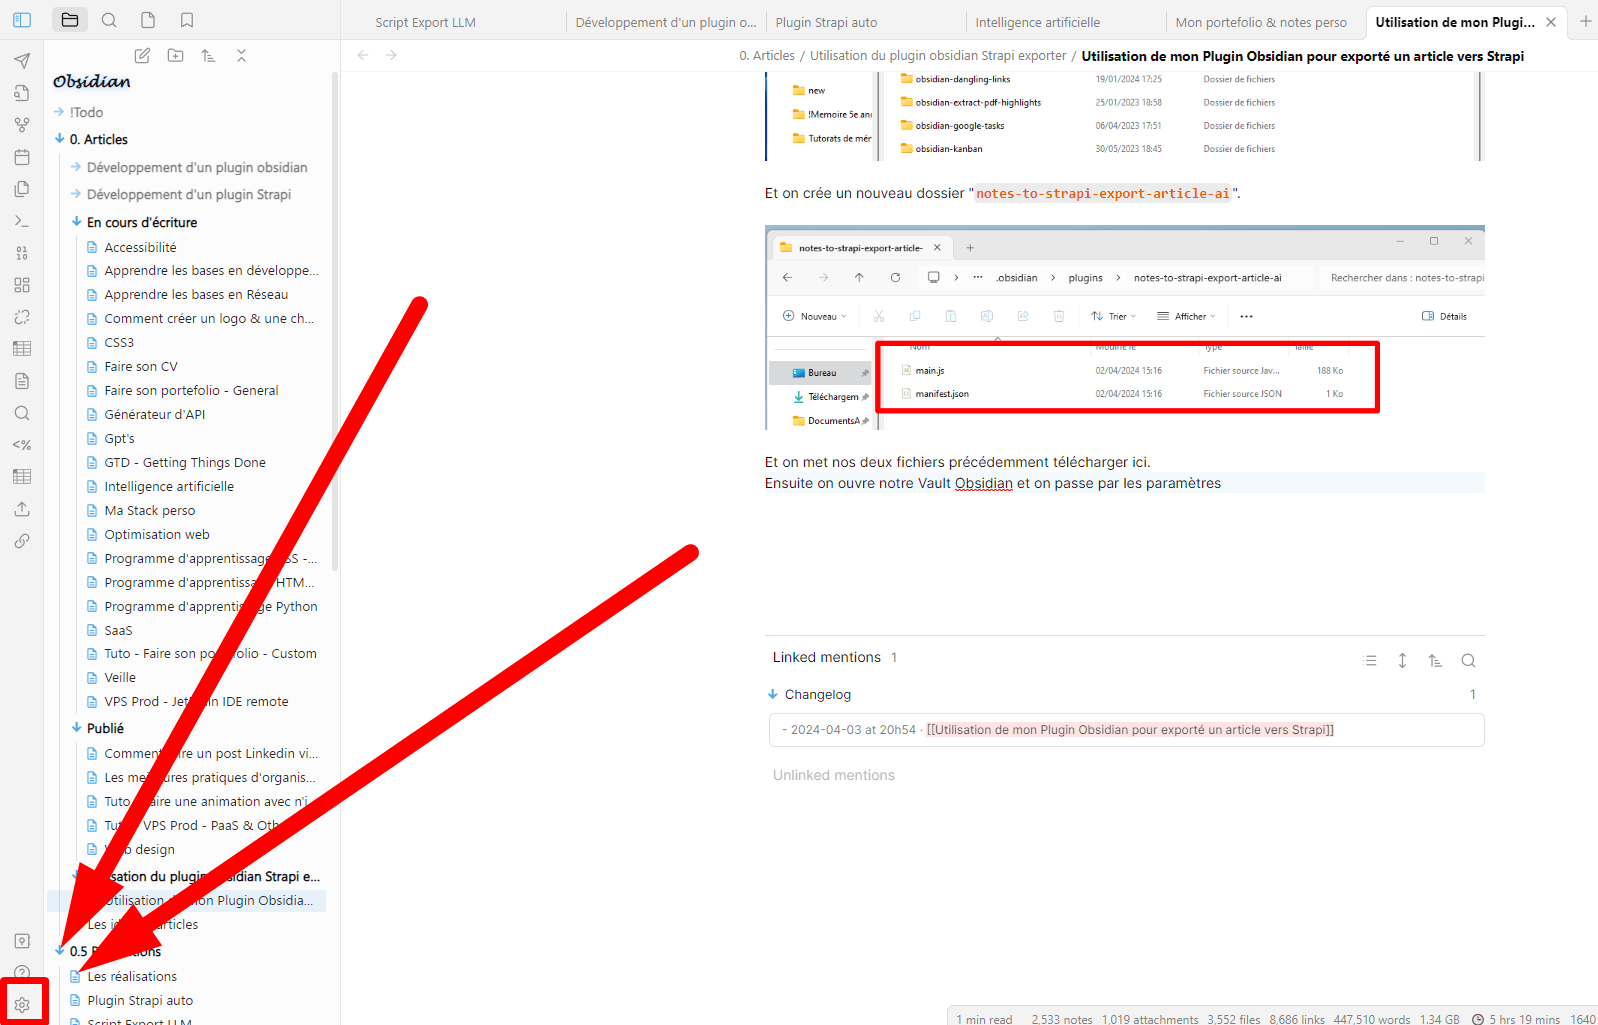
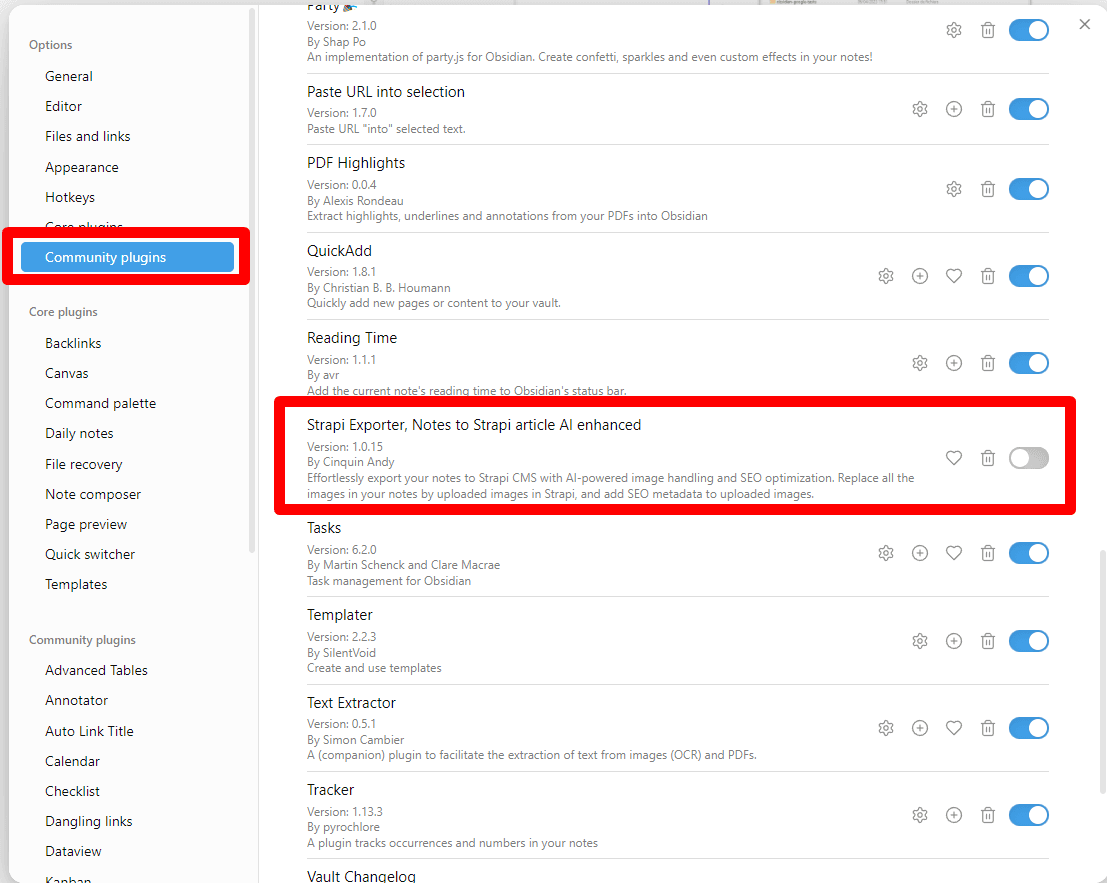
We activate the plugin, then move on to the configuration section.
Configuration
Let's move on to configuration
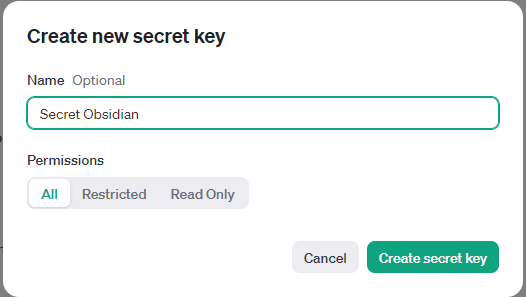
Strapi API Token
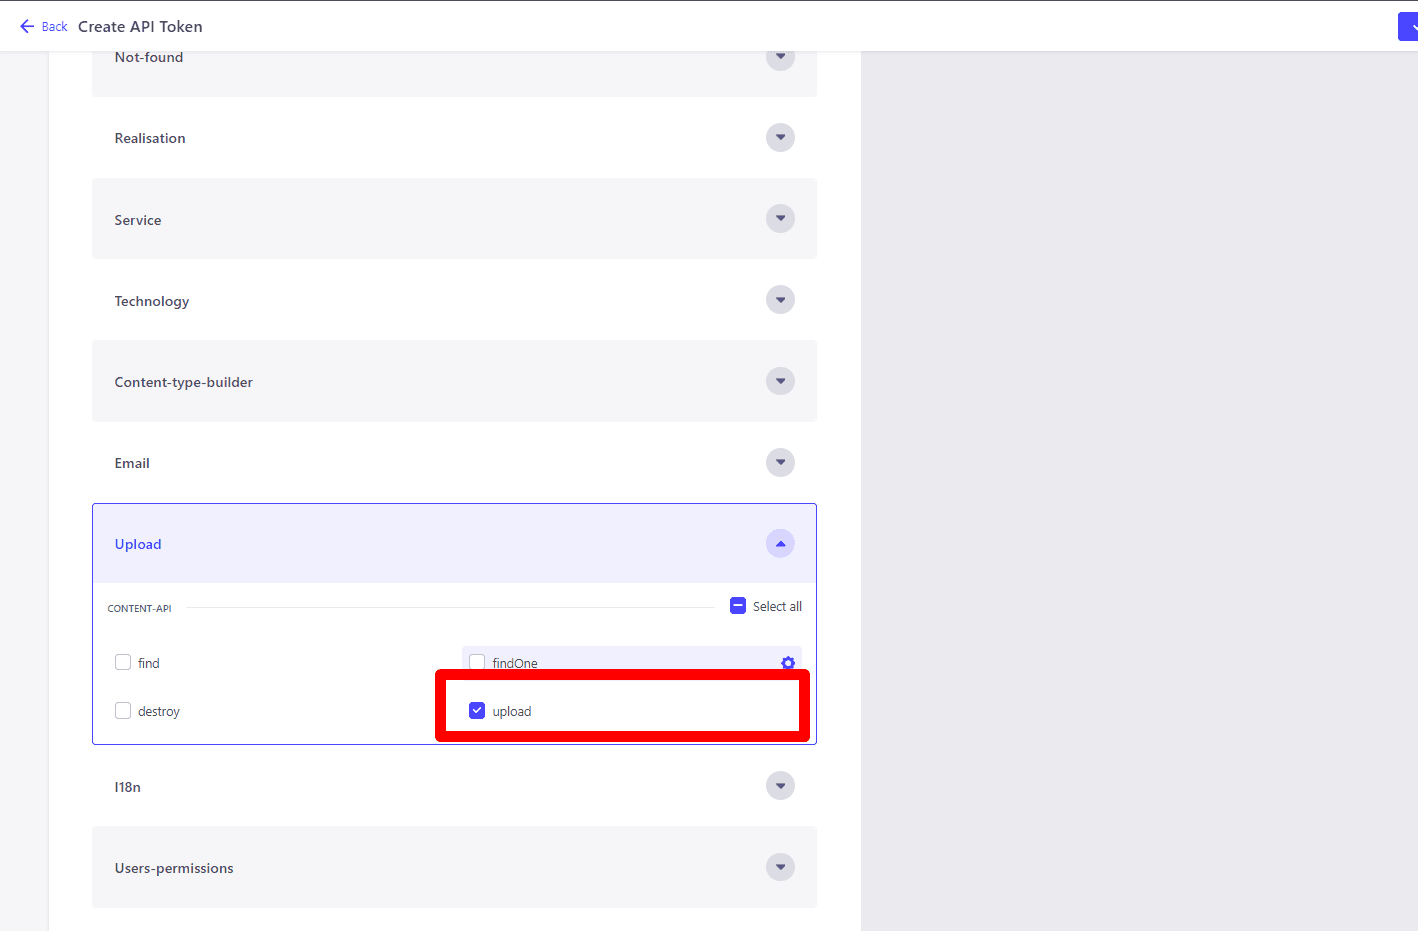
We'll start with the Strapi token.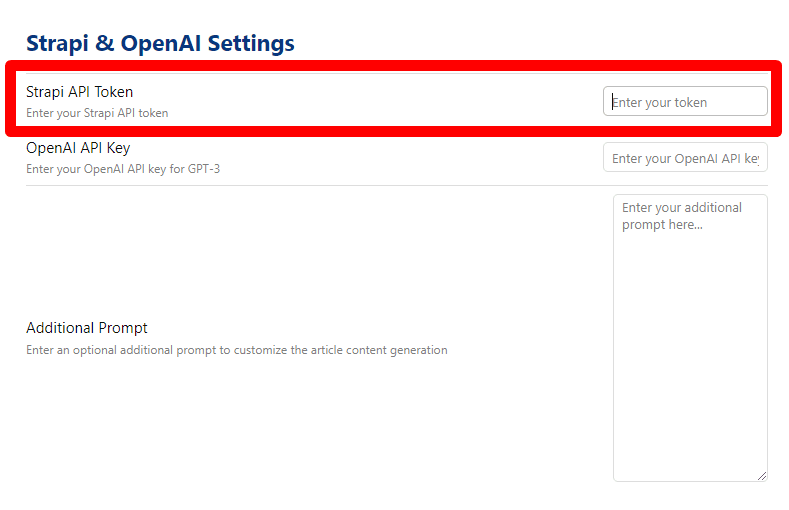 Go to the Strapi API. In settings, API Token, and create a token
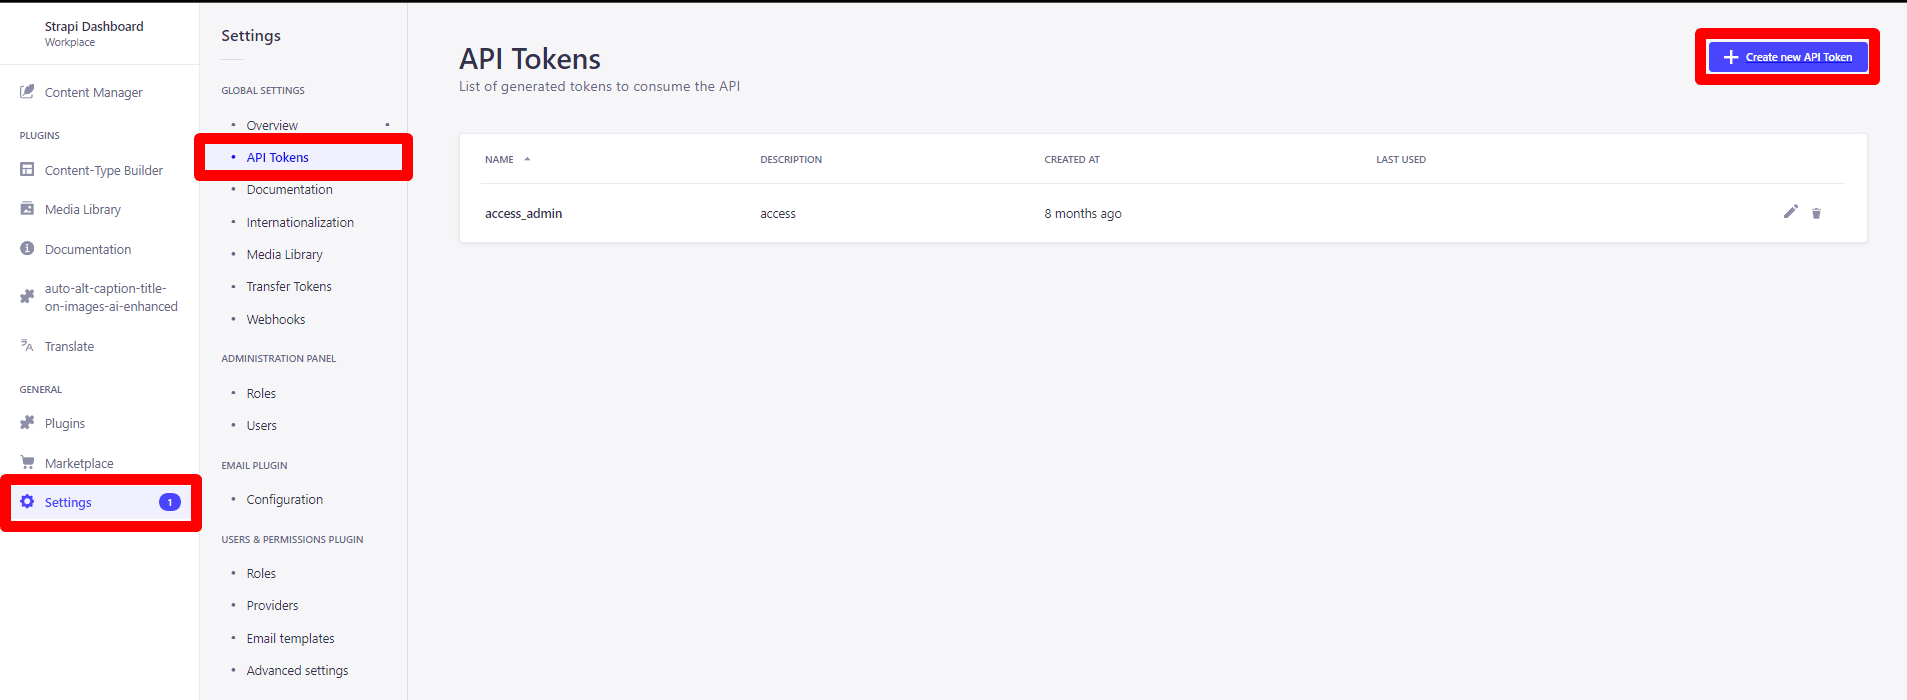
Simple
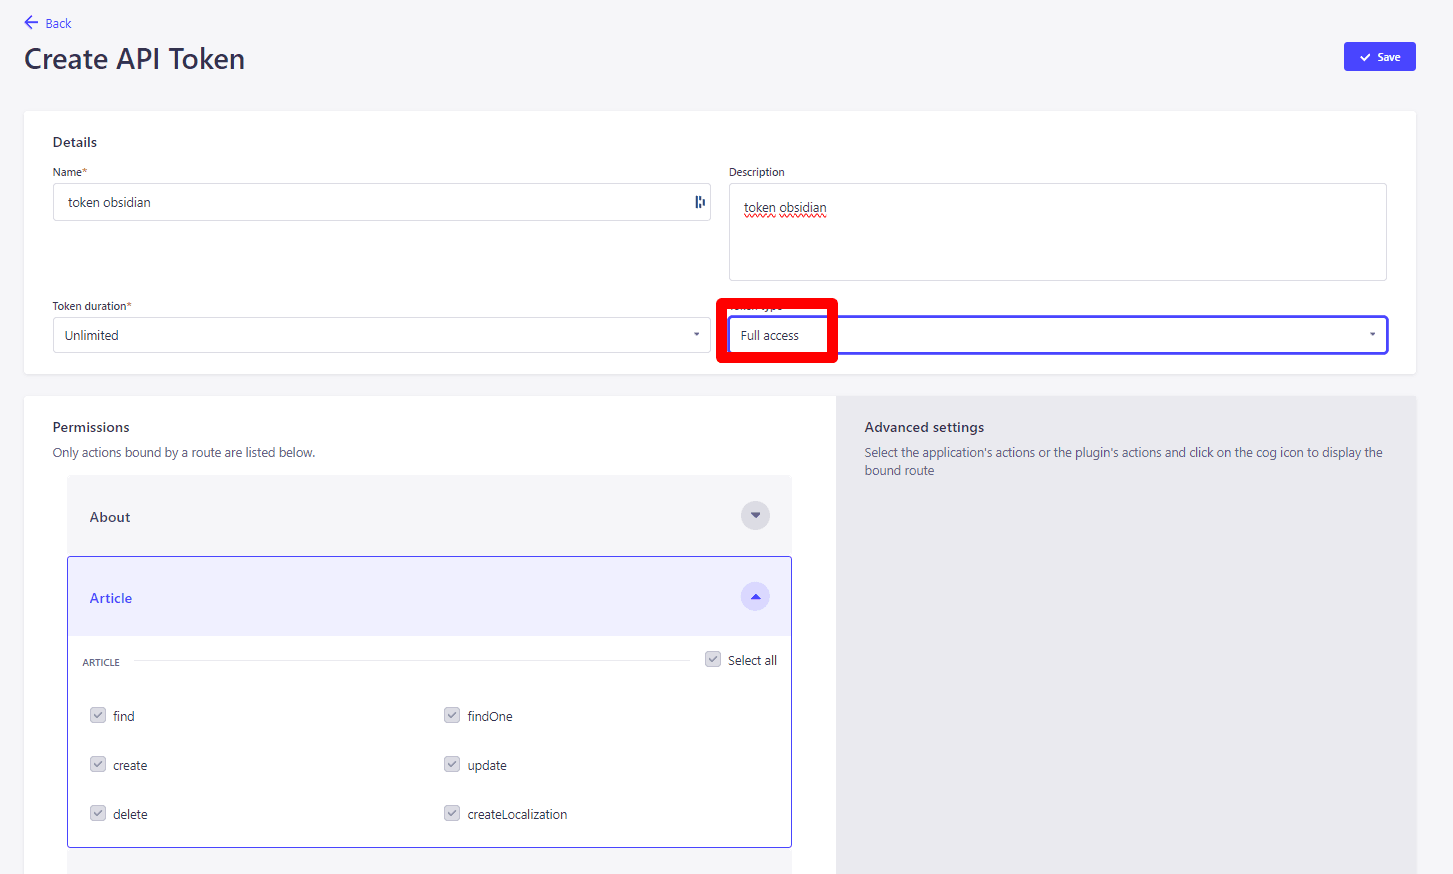
Advanced (optional)
With the rights strictly necessary to create an article, it is also necessary to have image upload rights.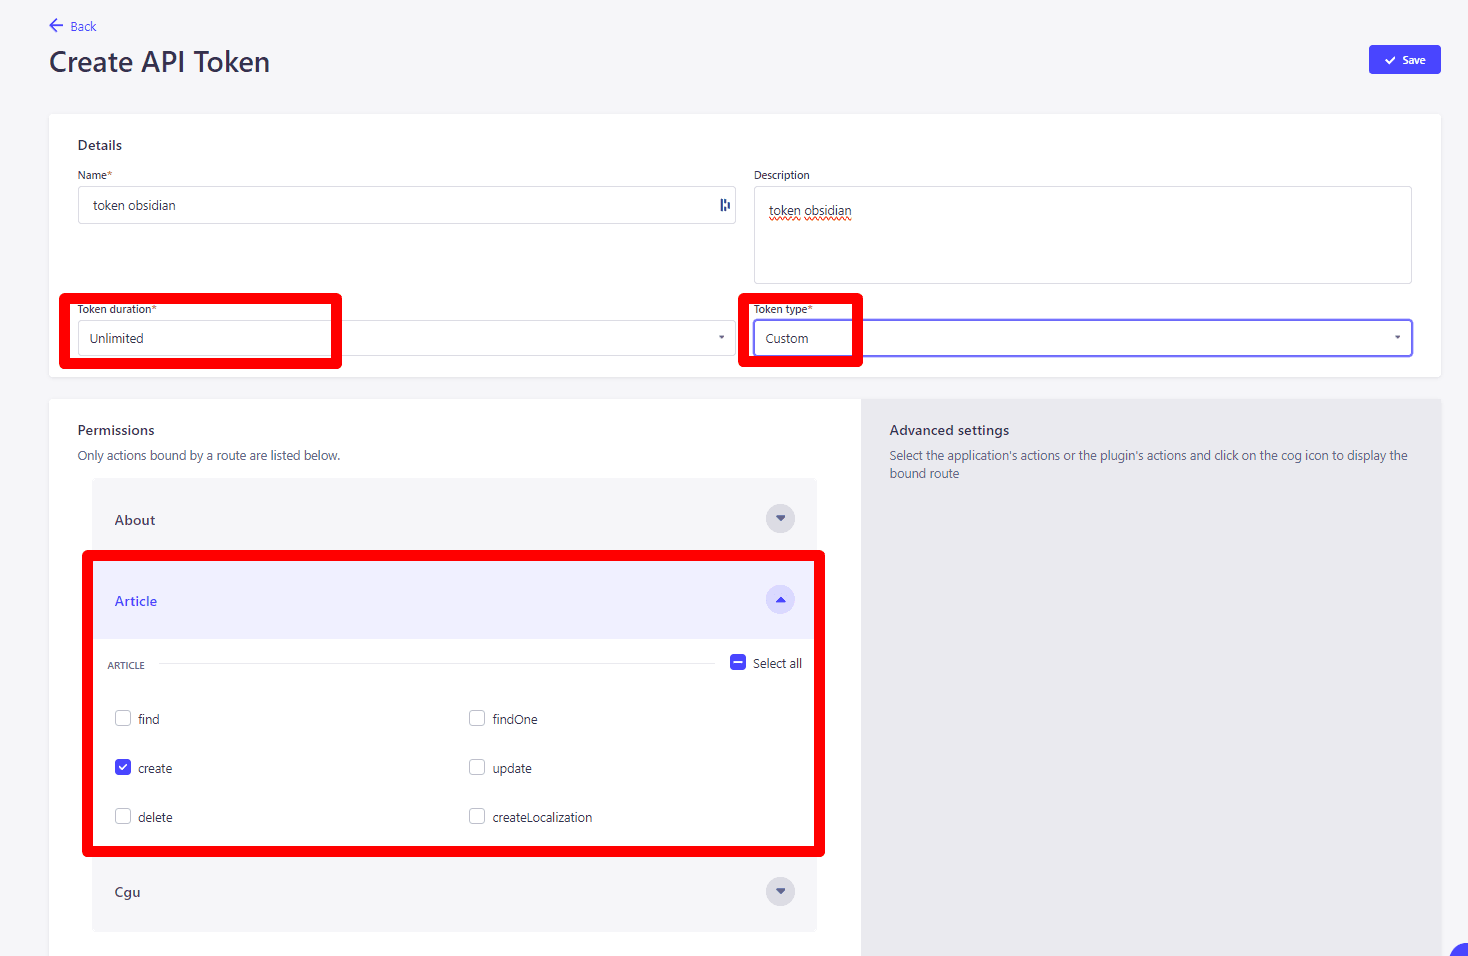
We take the generated Obsidian token, and put it in our config: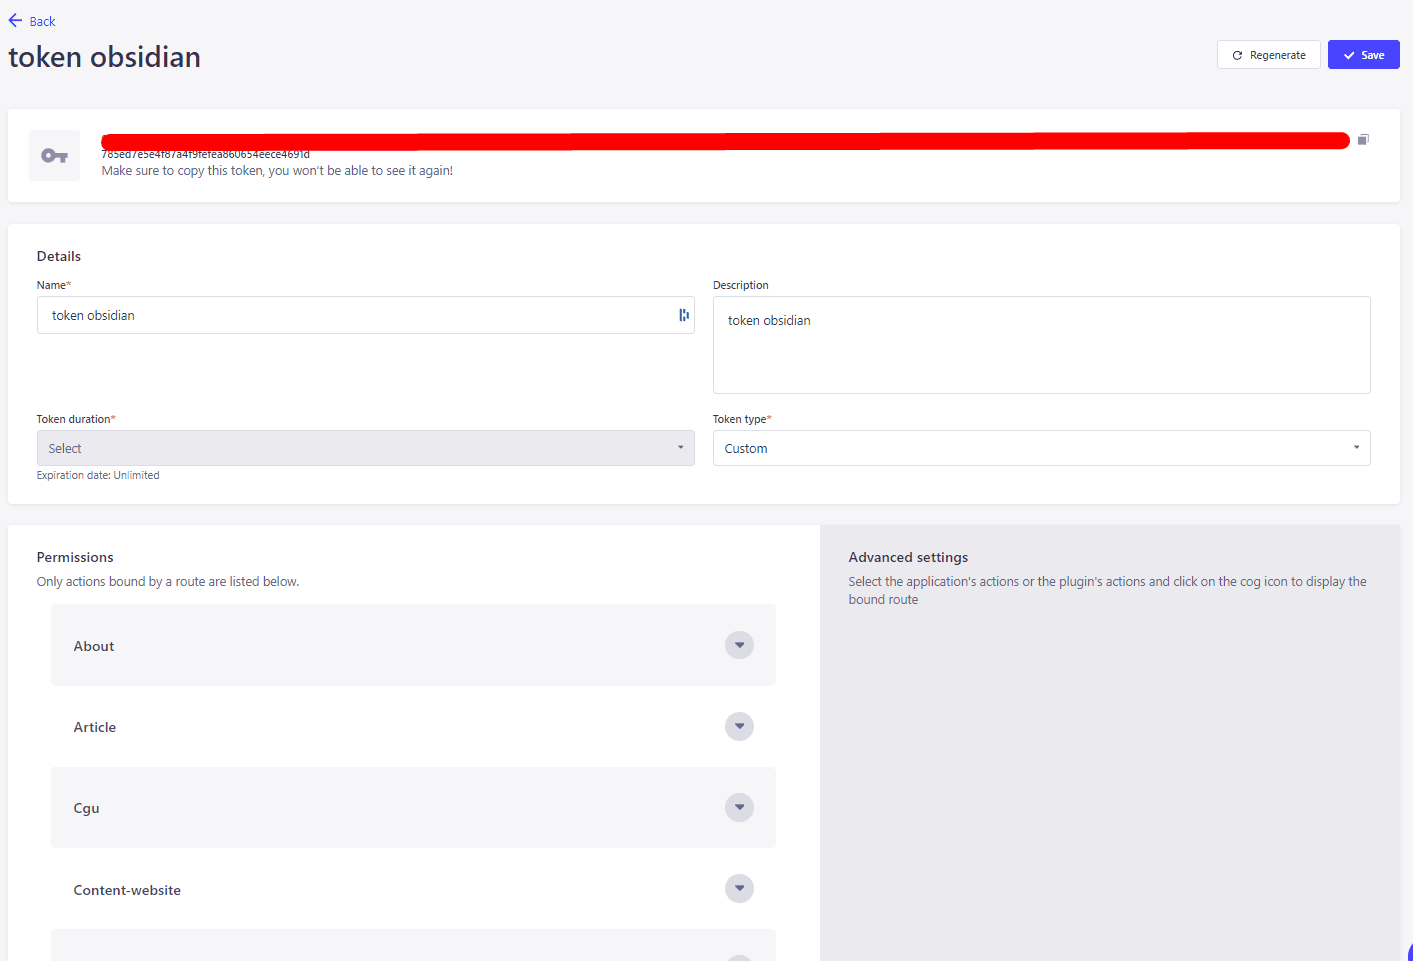
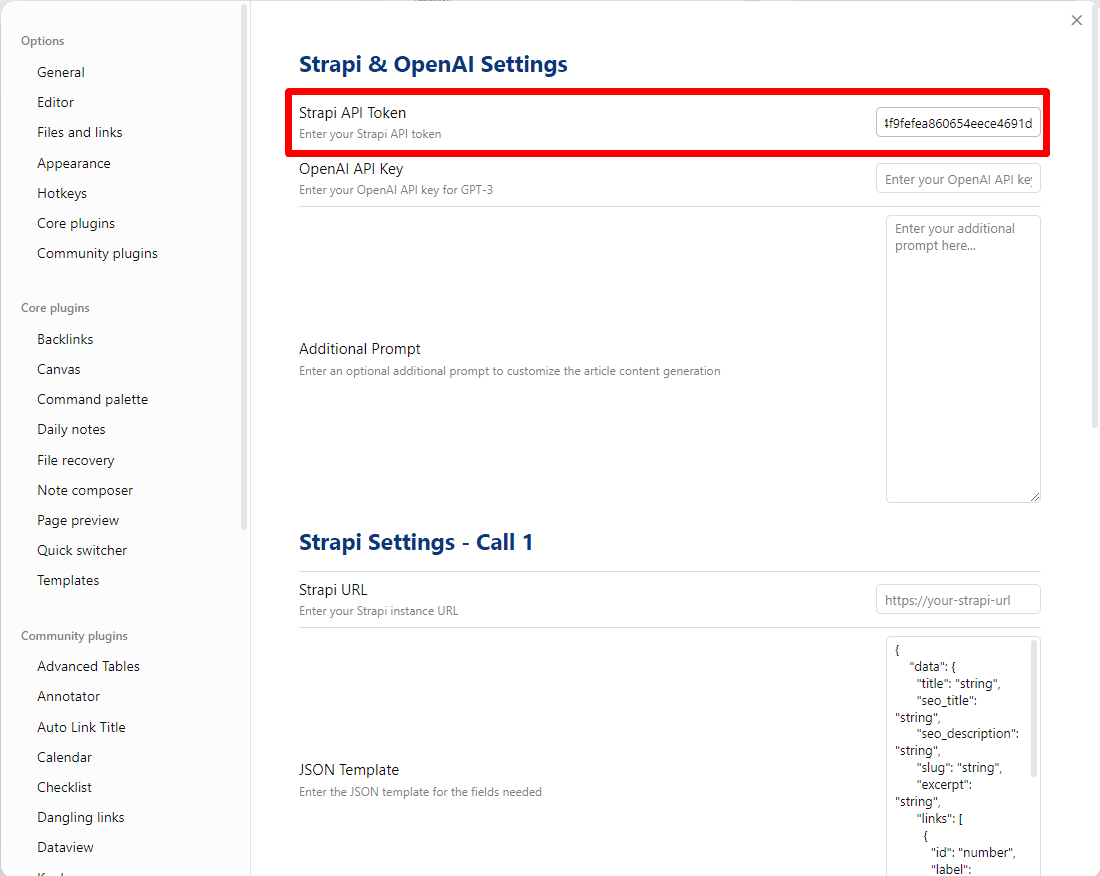
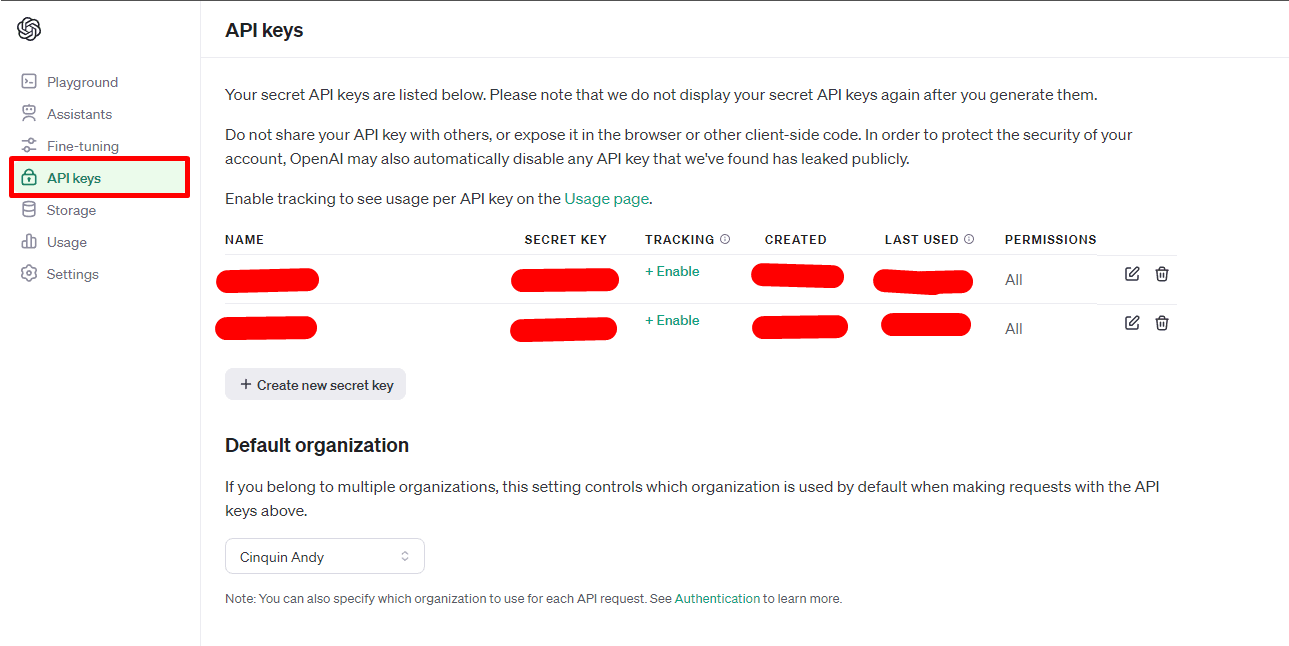
Open AI Settings
OpenAI PlatformWe'll look for a secret in the OpenAI config.

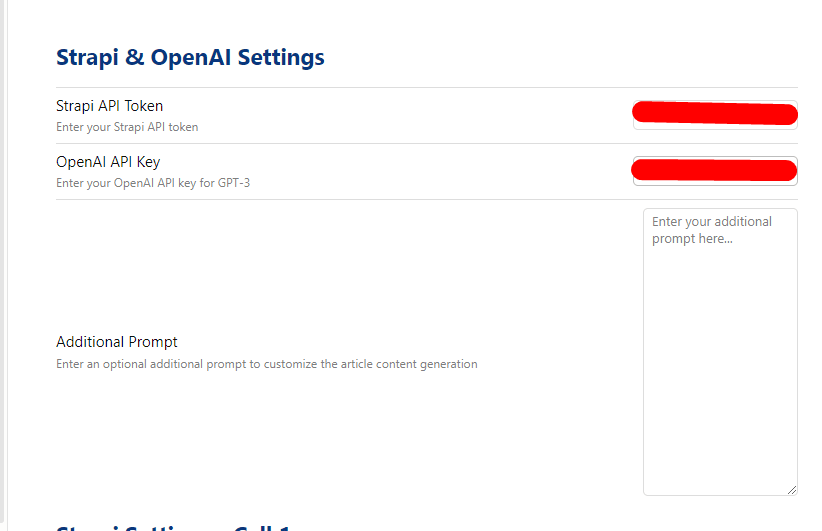
Additional prompt
Complete with an additional prompt if necessary, to specify additional information. Here, we're free to give ChatGPT additional information to get better results. For example, in my configuration I put this :
If present, the locale needs to be 'fr' and the content in French, and generate at least 8 tags if present in the schema too. If present, the rank needs to be 999. Meta Description: Write an attractive meta description including the main keyword, which encourages clicking on the article from the search results. Optimization for Readers and Search Engines: Write content that is not only optimized for search engines but also engaging and informative for readers. The content must answer their questions or solve a problem.
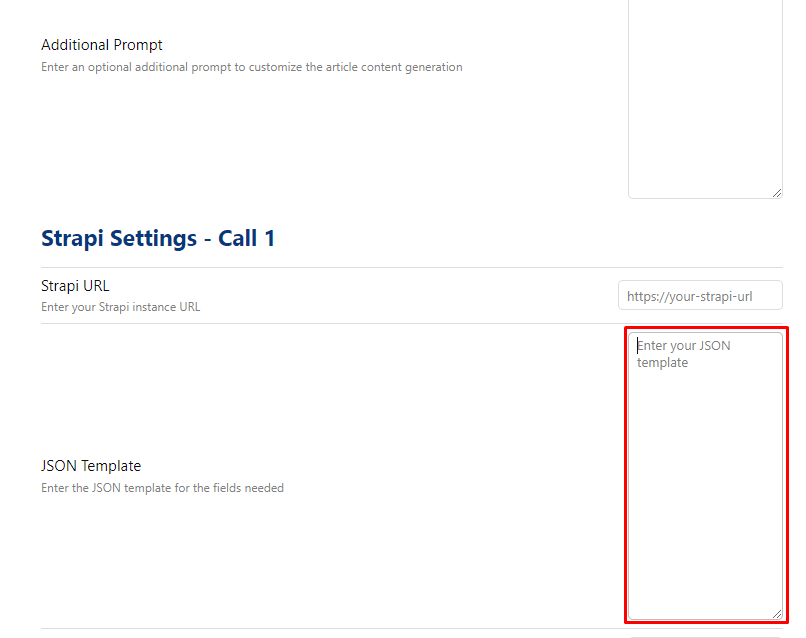
Strapi settings - call 1
Strapi URL ( call 1 )
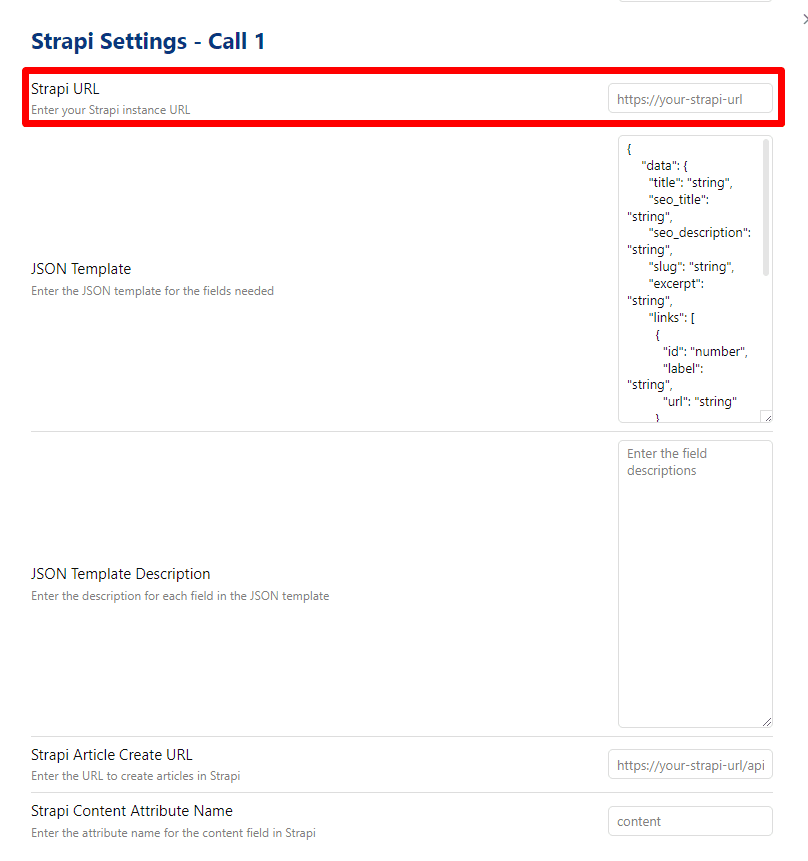
We retrieve the general URL of our Strapi, which for me is: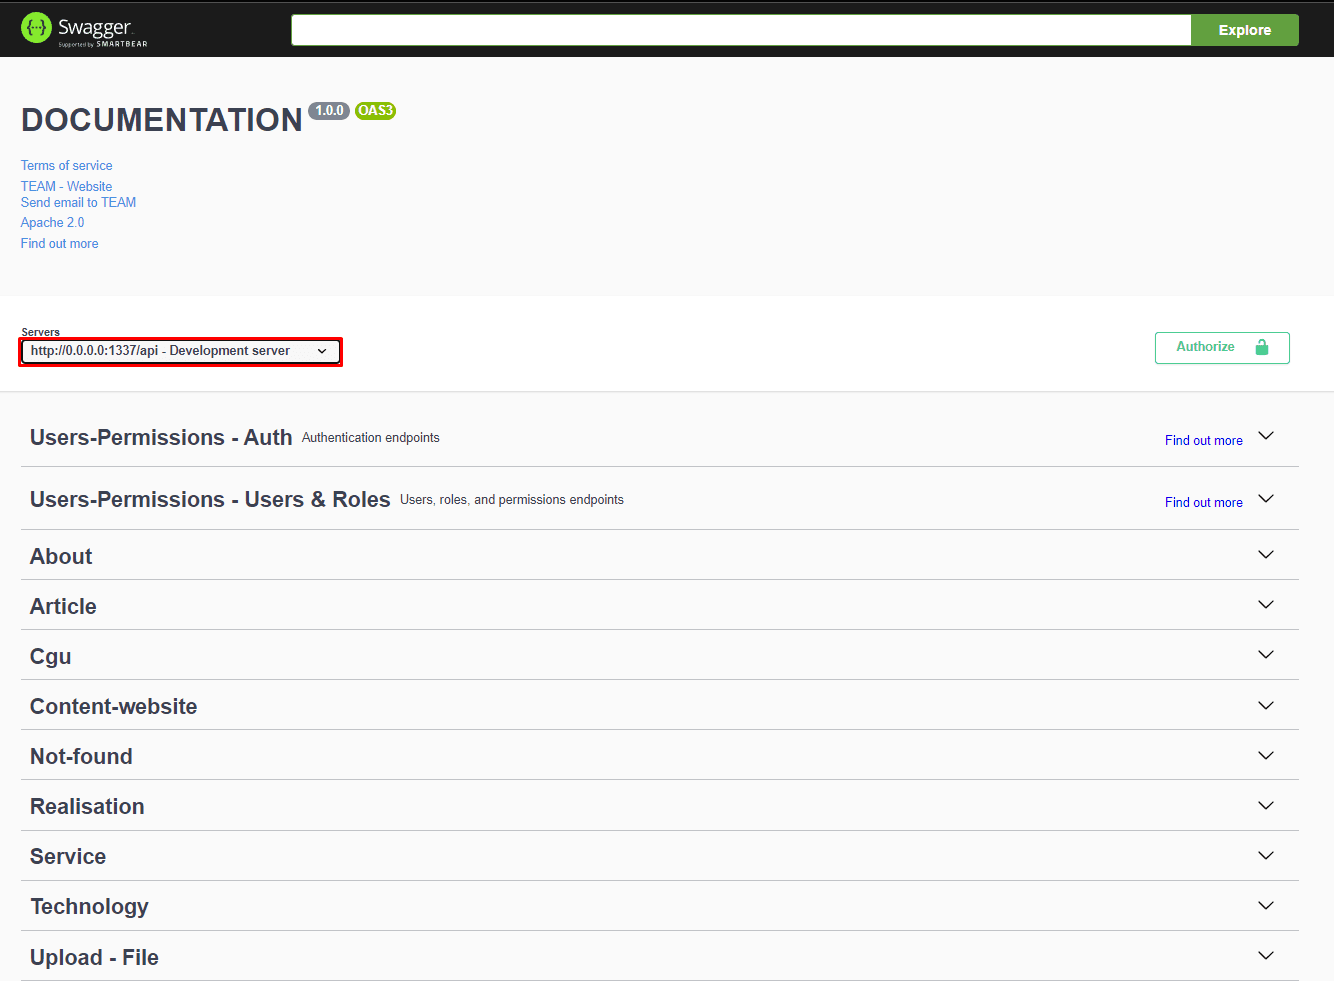 And we replace the local address displayed by the remote address, which for me is: https:
//api.andy-cinquin.frJson template config
This gives me :
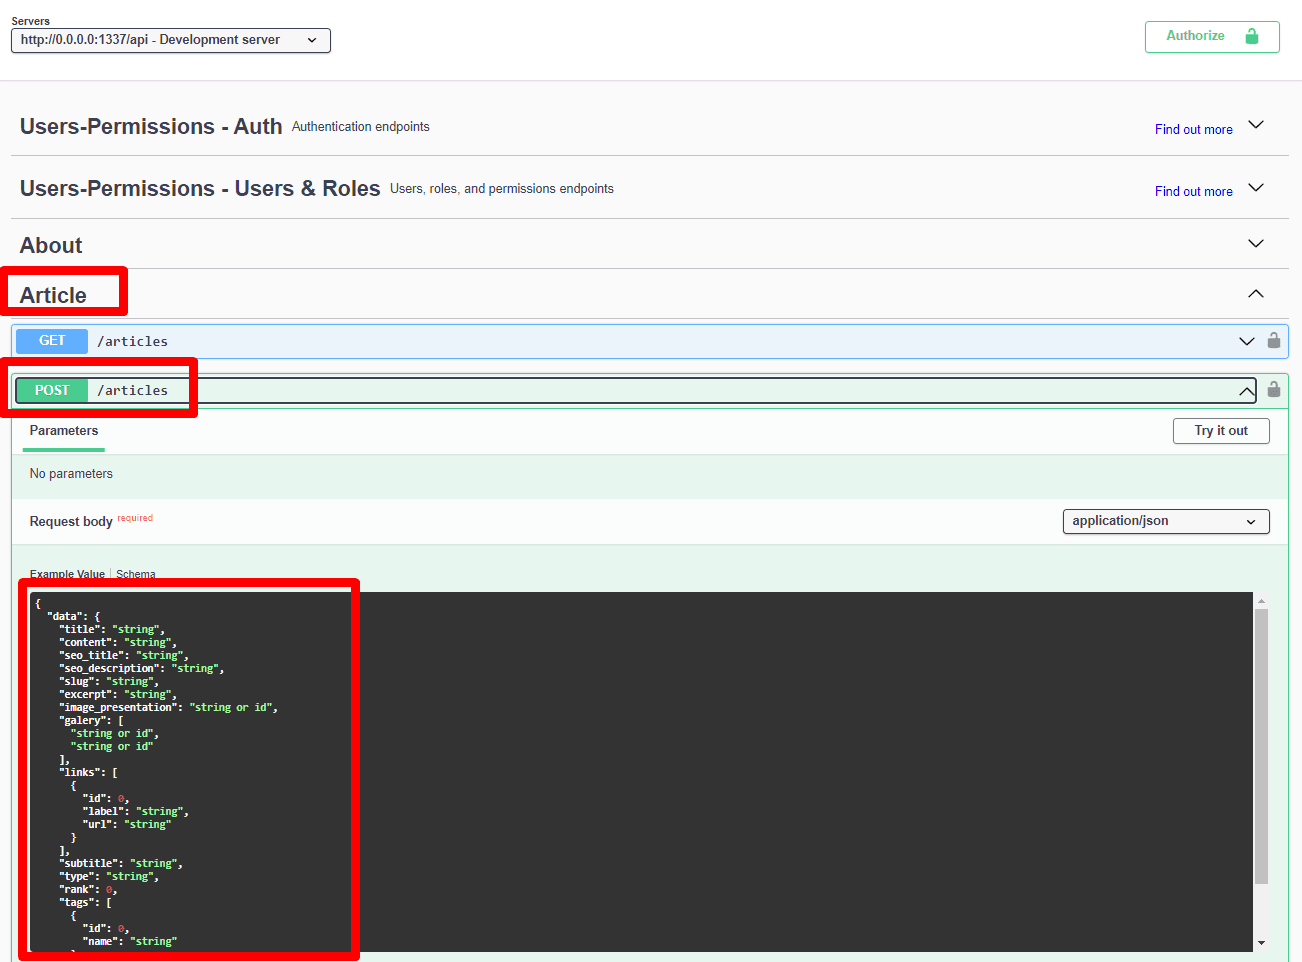
{ "data": { "title": "string", "seo_title": "string", "seo_description": "string", "slug": "string", "excerpt": "string", "links": [ { "id": "number", "label": "string", "url": "string" } ], "subtitle": "string", "type": "string", "rank": "number", "tags": [ { "id": "number", "name": "string" } ], "locale": "string" } }
Json template config description
Next, we'll configure the rest of our plugin with the "description" section. We use the same template, but describe what our data should look like, giving details and indications. In natural language (managed by an LLM, incredible isn't it?)
{ "data": { "title": "Title of the item, as a short string", "seo_title": "SEO optimized title, as a short string", "seo_description": "SEO optimized description, as a short string", "slug": "URL-friendly string derived from the title", "excerpt": "A short preview or snippet from the content", "links": "Array of related links with ID, label, and URL", "subtitle": "Subtitle or secondary title, as a short string", "type": "Category or type of the item, as a short string", "rank": "Numerical ranking or order priority, as a number", "tags": "Array of associated tags with ID and name", "locale": "Locale or language code, as a short string" } }
It looks like this to me!
Strapi create url

://api.andy-cinquin.fr/api/articlesStrapi content attribute name call
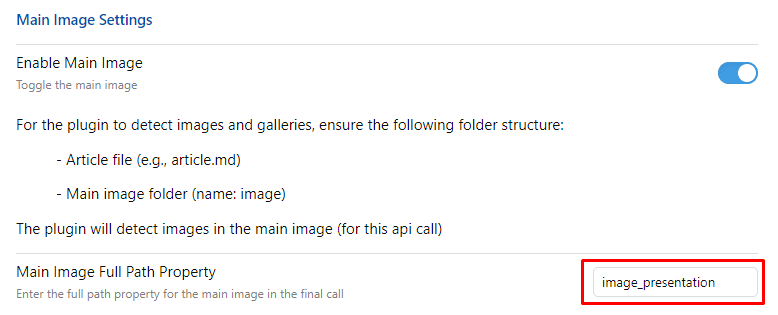
Optional (image)

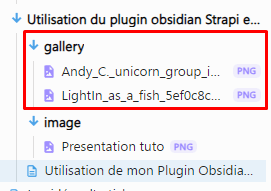
To be able to use it, you need to have a folder in your Obsidian called "image"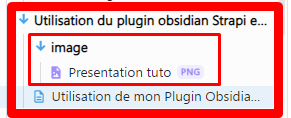 The architecture should look like this to be able to use a single image
Optional (gallery)
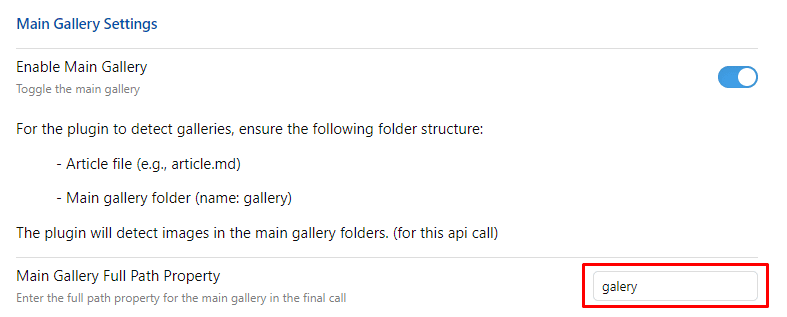
Configuration call 2 ( optional )
You can also configure a second route, in the same way
-> You'll need to restart your application when you activate your second route!
Using the application

And that's it, let the magic happen!
🚀 Thanks for reading!
If you enjoyed this article, feel free to share it around.
💡 Got an idea? Let's talk !☕